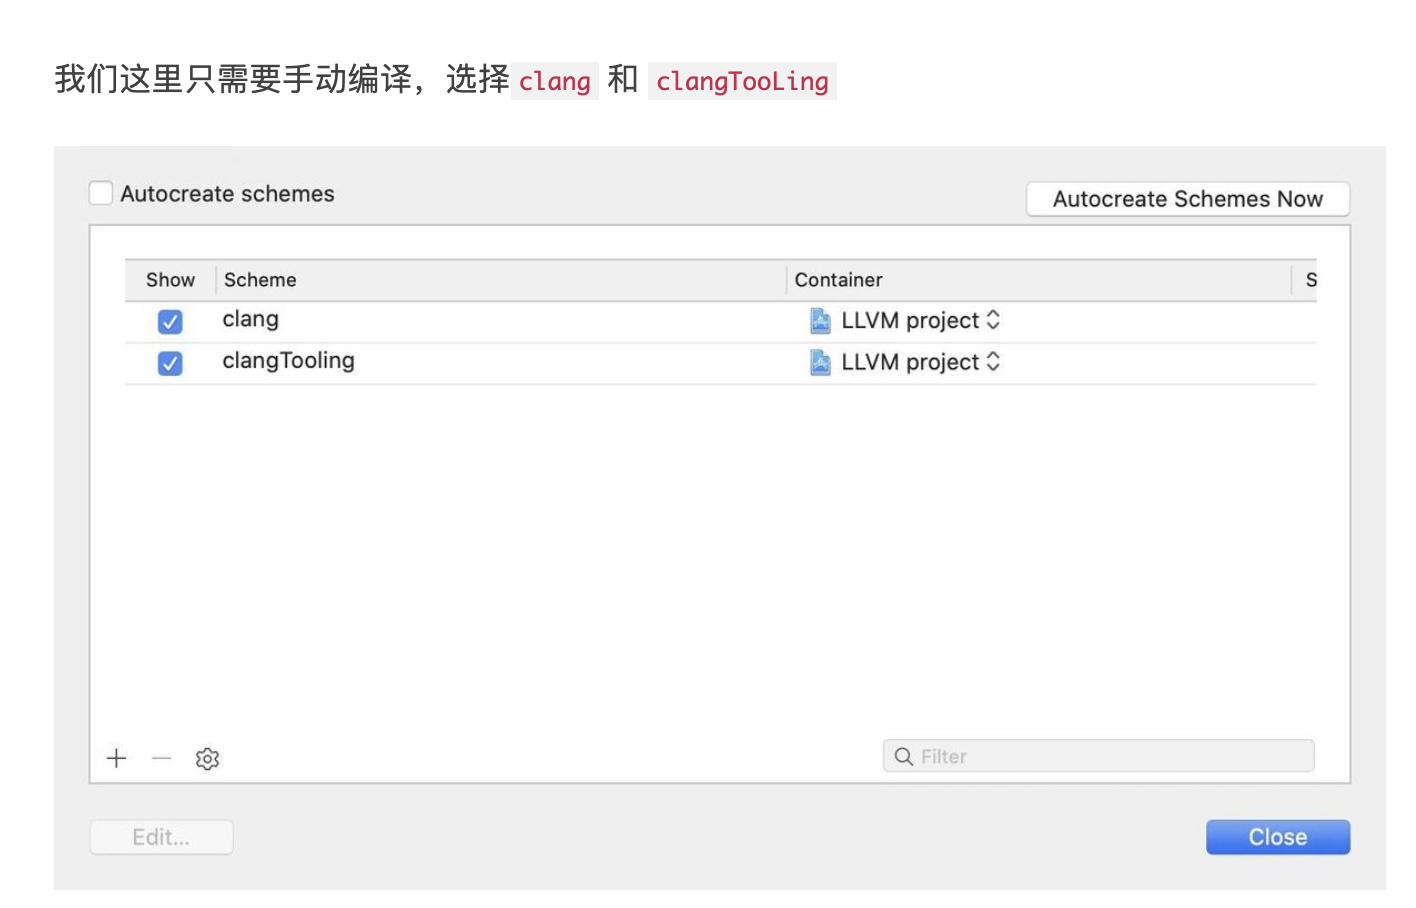
Visual Studio2015起官方开始支持Clang,具体做法: 文件->新建->项目->已安装->Visual C++->跨平台->安装Clang with Microsoft CodeGen Clang是一个完全不同的命令行工具链,这时候可以在工程配置中,平台工具集选项里找到Clang,然后使用ollvm的clang替换该clang即可。
@property(nonatomic,assign) UIRectEdge edgesForExtendedLayout NS_AVAILABLE_IOS(7_0); // Defaults to UIRectEdgeAll @property(nonatomic,assign) BOOL extendedLayoutIncludesOpaqueBars NS_AVAILABLE_IOS(7_0); // Defaults to NO, but bars are translucent by default on 7_0. @property(nonatomic,assign) BOOL automaticallyAdjustsScrollViewInsets API_DEPRECATED_WITH_REPLACEMENT("Use UIScrollView's contentInsetAdjustmentBehavior instead", ios(7.0,11.0),tvos(7.0,11.0)); // Defaults to YES
/* The top of the safeAreaLayoutGuide indicates the unobscured top edge of the view (e.g, not behind the status bar or navigation bar, if present). Similarly for the other edges. */ @property(nonatomic,readonly,strong) UILayoutGuide *safeAreaLayoutGuide API_AVAILABLE(ios(11.0),tvos(11.0));
/* When contentInsetAdjustmentBehavior allows, UIScrollView may incorporate its safeAreaInsets into the adjustedContentInset. */ @property(nonatomic, readonly) UIEdgeInsets adjustedContentInset API_AVAILABLE(ios(11.0),tvos(11.0));
/* Also see -scrollViewDidChangeAdjustedContentInset: in the UIScrollViewDelegate protocol. */ - (void)adjustedContentInsetDidChange API_AVAILABLE(ios(11.0),tvos(11.0)) NS_REQUIRES_SUPER;
/* Configure the behavior of adjustedContentInset. Default is UIScrollViewContentInsetAdjustmentAutomatic. */ @property(nonatomic) UIScrollViewContentInsetAdjustmentBehavior contentInsetAdjustmentBehavior API_AVAILABLE(ios(11.0),tvos(11.0));
/* contentLayoutGuide anchors (e.g., contentLayoutGuide.centerXAnchor, etc.) refer to the untranslated content area of the scroll view. */ @property(nonatomic,readonly,strong) UILayoutGuide *contentLayoutGuide API_AVAILABLE(ios(11.0),tvos(11.0));
/* frameLayoutGuide anchors (e.g., frameLayoutGuide.centerXAnchor) refer to the untransformed frame of the scroll view. */ @property(nonatomic,readonly,strong) UILayoutGuide *frameLayoutGuide API_AVAILABLE(ios(11.0),tvos(11.0));
SizeClasses多屏幕适配 当我们的程序可能需要同时在横屏和竖屏下运行并且横屏和竖屏下的布局还不一致时,而且希望我们的应用在小屏幕上和大屏幕上(比如iPhone8 Plus 以及iPhoneX S Max)的布局有差异时,我们可能需要用到苹果的SizeClasses技术。这是苹果在iOS8中推出来的一个概念。 但是在实际的实践中我们很少有看到使用SizeClasses的例子和场景以及在我们开发中很少有使用到这方面的技术,所以我认为这应该是苹果的一个多屏幕适配的失败解决的方案。从字面理解SizeClasses就是尺寸的种类,苹果将设备的宽和高分为了压缩和常规两种尺寸类型,因此我们可以得到如下几种类型的设备:
@Override publicvoidonSurfaceTextureAvailable(SurfaceTexture surface, int width, int height) {
mSurfaceTexture = surface;
mRect = new Rect(0, 0, width, height);
mSurface = new Surface(mSurfaceTexture); new Thread(this).start();
}
@Override publicvoidonSurfaceTextureSizeChanged(SurfaceTexture surface, int width, int height) {
mSurfaceTexture = surface;
mRect = new Rect(0, 0, width, height);
mSurface = new Surface(mSurfaceTexture);
}
以上都是2D图形渲染常见的方式,如果想要进行3D图形渲染或者是高级图像处理(比如滤镜、AR等效果),就必须得引入OpenGL ES来实现了。OpenGL ES (OpenGL for Embedded Systems) 是 OpenGL 三维图形 API 的子集,针对手机、PDA和游戏主机等嵌入式设备而设计,是一种图形渲染API的设计标准,不同的软硬件开发商在OpenGL API内部可能会有不同的实现方式。下面介绍一下在Android平台上,如何进行OpenGL ES渲染绘制,通常有以下三种方式:
SurfaceView + OpenGL ES
EGL是OpenGL API和原生窗口系统之间的接口,OpenGL ES 的平台无关性正是借助 EGL 实现的,EGL 屏蔽了不同平台的差异。如果使用OpenGL API来绘制图形就必须先构建EGL环境。
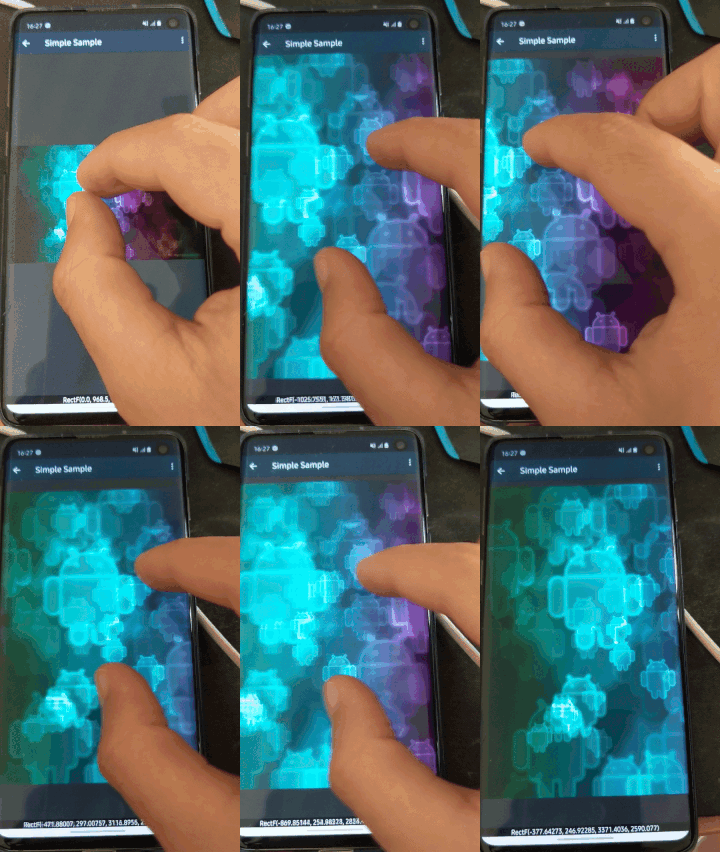
classPointerInputChange( val id: PointerId, // 手指Id val uptimeMillis: Long, // 当前手势事件的时间戳 val position: Offset, // 当前手势事件相对组件左上角的位置 val pressed: Boolean, // 当前手势是否按下 val previousUptimeMillis: Long, // 上一次手势事件的时间戳 val previousPosition: Offset, // 上一次手势事件相对组件左上角的位置 val previousPressed: Boolean, // 上一次手势是否按下 val consumed: ConsumedData, // 当前手势是否已被消费 val type: PointerType = PointerType.Touch // 手势类型(鼠标、手指、手写笔、橡皮)
)
API名称
作用
changedToDown
是否已经按下(按下手势已消费则返回false)
changedToDownIgnoreConsumed
是否已经按下(忽略按下手势已消费标记)
changedToUp
是否已经抬起(按下手势已消费则返回false)
changedToUpIgnoreConsumed
是否已经抬起(忽略按下手势已消费标记)
positionChanged
是否位置发生了改变(移动手势已消费则返回false)
positionChangedIgnoreConsumed
是否位置发生了改变(忽略已消费标记)
positionChange
位置改变量(移动手势已消费则返回Offset.Zero)
positionChangeIgnoreConsumed
位置改变量(忽略移动手势已消费标记)
positionChangeConsumed
当前移动手势是否已被消费
anyChangeConsumed
当前按下手势或移动手势是否有被消费
consumeDownChange
消费按下手势
consumePositionChange
消费移动手势
consumeAllChanges
消费按下与移动手势
isOutOfBounds
当前手势是否在固定范围内
这些 API 会在我们自定义手势处理时会被用到。可以发现的是,Compose 通过 PointerEventPass 来定制事件分发流程,在事件分发流程中即使前一个组件先获取了手势信息并进行了消费,后面的组件仍然可以通过带有 IgnoreConsumed 系列 API 来获取到手势信息。这也极大增加了手势操作的可定制性。就好像父组件先把事件消费,希望子组件不要处理这个手势了,但子组件完全可以不用听从父组件的话。
// Output: // first layer, downChange: false // third layer, downChange: true // second layer, downChange: true // first layer Outside // third layer Outside // second layer Outside
awaitFirstDown
awaitFirstDown 将等待第一根手指按下事件时恢复执行,并将手指按下事件返回。分析源码我们可以发现 awaitFirstDown 也使用的是 awaitPointerEvent 实现的,默认使用 Main 模式。
suspendfun AwaitPointerEventScope.awaitFirstDown(
requireUnconsumed: Boolean = true
): PointerInputChange { var event: PointerEvent do {
event = awaitPointerEvent()
} while (
!event.changes.fastAll { if (requireUnconsumed) it.changedToDown() else it.changedToDownIgnoreConsumed()
}
) return event.changes[0]
}
tinkerPatch { /**
* necessary,default 'null'
* the old apk path, use to diff with the new apk to build
* add apk from the build/bakApk
*/
oldApk = getOldApkPath() /**
* optional,default 'false'
* there are some cases we may get some warnings
* if ignoreWarning is true, we would just assert the patch process
* case 1: minSdkVersion is below 14, but you are using dexMode with raw.
* it must be crash when load.
* case 2: newly added Android Component in AndroidManifest.xml,
* it must be crash when load.
* case 3: loader classes in dex.loader{} are not keep in the main dex,
* it must be let tinker not work.
* case 4: loader classes in dex.loader{} changes,
* loader classes is ues to load patch dex. it is useless to change them.
* it won't crash, but these changes can't effect. you may ignore it
* case 5: resources.arsc has changed, but we don't use applyResourceMapping to build
*/
ignoreWarning = false
/**
* optional,default 'true'
* whether sign the patch file
* if not, you must do yourself. otherwise it can't check success during the patch loading
* we will use the sign config with your build type
*/
useSign = true
/**
* optional,default 'true'
* whether use tinker to build
*/
tinkerEnable = buildWithTinker()
/**
* Warning, applyMapping will affect the normal android build!
*/
buildConfig { /**
* optional,default 'null'
* if we use tinkerPatch to build the patch apk, you'd better to apply the old
* apk mapping file if minifyEnabled is enable!
* Warning:
* you must be careful that it will affect the normal assemble build!
*/
applyMapping = getApplyMappingPath() /**
* optional,default 'null'
* It is nice to keep the resource id from R.txt file to reduce java changes
*/
applyResourceMapping = getApplyResourceMappingPath()
/**
* necessary,default 'null'
* because we don't want to check the base apk with md5 in the runtime(it is slow)
* tinkerId is use to identify the unique base apk when the patch is tried to apply.
* we can use git rev, svn rev or simply versionCode.
* we will gen the tinkerId in your manifest automatic
*/
tinkerId = getTinkerIdValue()
/**
* if keepDexApply is true, class in which dex refer to the old apk.
* open this can reduce the dex diff file size.
*/
keepDexApply = false
/**
* optional, default 'false'
* Whether tinker should treat the base apk as the one being protected by app
* protection tools.
* If this attribute is true, the generated patch package will contain a
* dex including all changed classes instead of any dexdiff patch-info files.
*/
isProtectedApp = false
/**
* optional, default 'false'
* Whether tinker should support component hotplug (add new component dynamically).
* If this attribute is true, the component added in new apk will be available after
* patch is successfully loaded. Otherwise an error would be announced when generating patch
* on compile-time.
*
* <b>Notice that currently this feature is incubating and only support NON-EXPORTED Activity</b>
*/
supportHotplugComponent = false
}
dex { /**
* optional,default 'jar'
* only can be 'raw' or 'jar'. for raw, we would keep its original format
* for jar, we would repack dexes with zip format.
* if you want to support below 14, you must use jar
* or you want to save rom or check quicker, you can use raw mode also
*/
dexMode = "jar"
/**
* necessary,default '[]'
* what dexes in apk are expected to deal with tinkerPatch
* it support * or ? pattern.
*/
pattern = ["classes*.dex", "assets/secondary-dex-?.jar"] /**
* necessary,default '[]'
* Warning, it is very very important, loader classes can't change with patch.
* thus, they will be removed from patch dexes.
* you must put the following class into main dex.
* Simply, you should add your own application {@code tinker.sample.android.SampleApplication}
* own tinkerLoader, and the classes you use in them
*
*/
loader = [ //use sample, let BaseBuildInfo unchangeable with tinker "tinker.sample.android.app.BaseBuildInfo"
]
}
lib { /**
* optional,default '[]'
* what library in apk are expected to deal with tinkerPatch
* it support * or ? pattern.
* for library in assets, we would just recover them in the patch directory
* you can get them in TinkerLoadResult with Tinker
*/
pattern = ["lib/*/*.so"]
}
res { /**
* optional,default '[]'
* what resource in apk are expected to deal with tinkerPatch
* it support * or ? pattern.
* you must include all your resources in apk here,
* otherwise, they won't repack in the new apk resources.
*/
pattern = ["res/*", "assets/*", "resources.arsc", "AndroidManifest.xml"]
/**
* optional,default '[]'
* the resource file exclude patterns, ignore add, delete or modify resource change
* it support * or ? pattern.
* Warning, we can only use for files no relative with resources.arsc
*/
ignoreChange = ["assets/sample_meta.txt"]
/**
* default 100kb
* for modify resource, if it is larger than 'largeModSize'
* we would like to use bsdiff algorithm to reduce patch file size
*/
largeModSize = 100
}
packageConfig { /**
* optional,default 'TINKER_ID, TINKER_ID_VALUE' 'NEW_TINKER_ID, NEW_TINKER_ID_VALUE'
* package meta file gen. path is assets/package_meta.txt in patch file
* you can use securityCheck.getPackageProperties() in your ownPackageCheck method
* or TinkerLoadResult.getPackageConfigByName
* we will get the TINKER_ID from the old apk manifest for you automatic,
* other config files (such as patchMessage below)is not necessary
*/
configField("patchMessage", "tinker is sample to use") /**
* just a sample case, you can use such as sdkVersion, brand, channel...
* you can parse it in the SamplePatchListener.
* Then you can use patch conditional!
*/
configField("platform", "all") /**
* patch version via packageConfig
*/
configField("patchVersion", "1.0")
} //or you can add config filed outside, or get meta value from old apk //project.tinkerPatch.packageConfig.configField("test1", project.tinkerPatch.packageConfig.getMetaDataFromOldApk("Test")) //project.tinkerPatch.packageConfig.configField("test2", "sample")
/**
* if you don't use zipArtifact or path, we just use 7za to try
*/
sevenZip { /**
* optional,default '7za'
* the 7zip artifact path, it will use the right 7za with your platform
*/
zipArtifact = "com.tencent.mm:SevenZip:1.1.10" /**
* optional,default '7za'
* you can specify the 7za path yourself, it will overwrite the zipArtifact value
*/ // path = "/usr/local/bin/7za"
}
} 复制代码
void disableArchiveDex(Projectproject) { println'disableArchiveDex -->' try { def booleanOptClazz = Class.forName('com.android.build.gradle.options.BooleanOption') def enableDexArchiveField = booleanOptClazz.getDeclaredField('ENABLE_DEX_ARCHIVE')
enableDexArchiveField.setAccessible(true) def enableDexArchiveEnumObj = enableDexArchiveField.get(null) def defValField = enableDexArchiveEnumObj.getClass().getDeclaredField('defaultValue')
defValField.setAccessible(true)
defValField.set(enableDexArchiveEnumObj, false)
} catch (Throwable thr) { // To some extends, class not found means we are in lower version of android gradle // plugin, so just ignore that exception. if (!(thr instanceof ClassNotFoundException)) { project.logger.error("reflectDexArchiveFlag error: ${thr.getMessage()}.")
}
}
} 复制代码
var result = Darwin.connect(socketFD, pointer, socklen_t(MemoryLayout.size(ofValue: sock4))) guard result != -1 else { fatalError("Error in connect() function code is \(errno)") } // 组装文本协议 访问 菜鸟教程Http教程 let sendMessage = "GET /http/http-tutorial.html HTTP/1.1\r\n" + "Host: http://www.runoob.com\r\n" + "Connection: keep-alive\r\n" + "USer-Agent: Socket-Client\r\n\r\n" //转换成二进制 guard let data = sendMessage.data(using: .utf8) else { fatalError("Error occur when transfer to data") } // 转换指针 let dataPointer = data.withUnsafeBytes({UnsafeRawPointer($0)})
let status = Darwin.write(socketFD, dataPointer, data.count)
guard status != -1 else { fatalError("Error in write() function code is \(errno)") } // 设置32Kb字节存储防止溢出 let readData = Data(count: 64 * 1024)
let readPointer = readData.withUnsafeBytes({UnsafeMutableRawPointer(mutating: $0)}) // 记录当前读取多少字节 var currentRead = 0
while true { // 读取socket数据 let result = Darwin.read(socketFD, readPointer + currentRead, readData.count - currentRead)
guard result >= 0 else { fatalError("Error in read() function code is \(errno)") } // 这里睡眠是减少调用频率 sleep(2) if result == 0 { print("无新数据") continue } // 记录最新读取数据 currentRead += result // 打印 print(String(data: readData, encoding: .utf8) ?? "")
// The extra object can be used for custom properties and makes them available to all // modules in the project. // The following are only a few examples of the types of properties you can define.
extra["compileSdkVersion"] = 28 // You can also create properties to specify versions for dependencies. // Having consistent versions between modules can avoid conflicts with behavior.
extra["supportLibVersion"] = "28.0.0" 复制代码
android { // Use the following syntax to access properties you defined at the project level: // rootProject.extra["property_name"]
compileSdkVersion(rootProject.extra["sdkVersion"])
// Alternatively, you can access properties using a type safe delegate: val sdkVersion: Intby rootProject.extra
...
compileSdkVersion(sdkVersion)
}
...
dependencies {
implementation("com.android.support:appcompat-v7:${rootProject.ext.supportLibVersion}")
...
} 复制代码
private fun promoteAndExecute(): Boolean {
...
val executableCalls = mutableListOf<AsyncCall>() synchronized(this) {
val i = readyAsyncCalls.iterator() while (i.hasNext()) {
val asyncCall = i.next()
if (runningAsyncCalls.size >= this.maxRequests) break// Max capacity. if (asyncCall.callsPerHost.get() >= this.maxRequestsPerHost) continue// Host max capacity.
internal fun initExchange(chain: RealInterceptorChain): Exchange {
...
val exchangeFinder = this.exchangeFinder!!
val codec = exchangeFinder.find(client, chain)
val result = Exchange(this, eventListener, exchangeFinder, codec) this.interceptorScopedExchange = result this.exchange = result
...
if (canceled) throw IOException("Canceled") return result
}
if (connectionPool.callAcquirePooledConnection(address, call, routes, true)) {
val result = call.connection!!
newConnection.socket().closeQuietly() return result
}
private fun connectTls(connectionSpecSelector: ConnectionSpecSelector) {
val address = route.address
val sslSocketFactory = address.sslSocketFactory var success = false var sslSocket: SSLSocket? = null try { // Create the wrapper over the connected socket.
sslSocket = sslSocketFactory!!.createSocket(
rawSocket, address.url.host, address.url.port, true/* autoClose */) as SSLSocket
// Configure the socket's ciphers, TLS versions, and extensions.
val connectionSpec = connectionSpecSelector.configureSecureSocket(sslSocket) if (connectionSpec.supportsTlsExtensions) {
Platform.get().configureTlsExtensions(sslSocket, address.url.host, address.protocols)
}
// Force handshake. This can throw!
sslSocket.startHandshake() // block for session establishment
val sslSocketSession = sslSocket.session
val unverifiedHandshake = sslSocketSession.handshake()
// Verify that the socket's certificates are acceptable for the target host. if (!address.hostnameVerifier!!.verify(address.url.host, sslSocketSession)) {
val peerCertificates = unverifiedHandshake.peerCertificates if (peerCertificates.isNotEmpty()) {
val cert = peerCertificates[0] as X509Certificate throw SSLPeerUnverifiedException("""
|Hostname ${address.url.host} not verified:
| certificate: ${CertificatePinner.pin(cert)}
| DN: ${cert.subjectDN.name}
| subjectAltNames: ${OkHostnameVerifier.allSubjectAltNames(cert)}
""".trimMargin())
} else { throw SSLPeerUnverifiedException( "Hostname ${address.url.host} not verified (no certificates)")
}
}
val certificatePinner = address.certificatePinner!!
// Check that the certificate pinner is satisfied by the certificates presented.
certificatePinner.check(address.url.host) {
handshake!!.peerCertificates.map { it as X509Certificate }
}
// Success! Save the handshake and the ALPN protocol.
val maybeProtocol = if (connectionSpec.supportsTlsExtensions) {
Platform.get().getSelectedProtocol(sslSocket)
} else { null
}
socket = sslSocket
source = sslSocket.source().buffer()
sink = sslSocket.sink().buffer()
protocol = if (maybeProtocol != null) Protocol.get(maybeProtocol) else Protocol.HTTP_1_1
success = true
} finally {
...
}
}
override fun get(key: String, defInt: Int): Int {
//TODO here return default value which is inside sdk, you can change it as you wish. matrix-sdk-key in class MatrixEnum.
if (MatrixEnum.clicfg_matrix_resource_max_detect_times.name == key) {
MatrixLog.i(TAG, "key:$key, before change:$defInt, after change, value:2")
return 2 //new value
}
if (MatrixEnum.clicfg_matrix_trace_fps_report_threshold.name == key) {
return 10000
}
if (MatrixEnum.clicfg_matrix_trace_fps_time_slice.name == key) {
return 12000
}
if (ExptEnum.clicfg_matrix_trace_app_start_up_threshold.name == key) {
return 3000
}
return if (ExptEnum.clicfg_matrix_trace_evil_method_threshold.name == key) {
200
} else defInt
}
override fun get(key: String, defLong: Long): Long {
//TODO here return default value which is inside sdk, you can change it as you wish. matrix-sdk-key in class MatrixEnum.
if (MatrixEnum.clicfg_matrix_trace_fps_report_threshold.name == key) {
return 10000L
}
if (MatrixEnum.clicfg_matrix_resource_detect_interval_millis.name == key) {
MatrixLog.i(TAG, "$key, before change:$defLong, after change, value:2000")
return 2000
}
return defLong
}
override fun get(key: String, defBool: Boolean): Boolean {
//TODO here return default value which is inside sdk, you can change it as you wish. matrix-sdk-key in class MatrixEnum.
return defBool
}
override fun get(key: String, defFloat: Float): Float {
//TODO here return default value which is inside sdk, you can change it as you wish. matrix-sdk-key in class MatrixEnum.
return defFloat
}
companion object {
private const val TAG = "Matrix.DynamicConfigImplDemo"
}
}
android.os.Handler dispatchMessage 1344
.com.peter.viewgrouptutorial.MyApp$ApplicationTask run 1338
..com.peter.viewgrouptutorial.MyApp access$A 1338
...com.peter.viewgrouptutorial.MyApp A 1338
....com.peter.viewgrouptutorial.MyApp B 379
.....com.peter.viewgrouptutorial.MyApp C 160
......com.peter.viewgrouptutorial.MyApp D 17
......com.peter.viewgrouptutorial.MyApp E 20
......com.peter.viewgrouptutorial.MyApp F 20
.....com.peter.viewgrouptutorial.MyApp G 20
....com.peter.viewgrouptutorial.MyApp H 56
.....com.peter.viewgrouptutorial.MyApp I 21
.....com.peter.viewgrouptutorial.MyApp J 5
.....com.peter.viewgrouptutorial.MyApp K 10
....com.peter.viewgrouptutorial.MyApp L 102
可以,接口中的属性默认都是用public static final 修饰的,默认是一个常量,对于自定义注解来说,这点没有任何区别。而接口中的方法其实就相当于自定义注解的属性,只不过自定义注解还可以给默认值。因此我们在学习自定义注解属性时,我们应该把它当作一个新知识,加上我刚才对接口的分析对比,你上面的那些疑问便可以迎刃而解了
3)、注解属性使用
1、在使用注解的后面接上一对括号,括号里面使用 属性名 = value 的格式,多个属性之间中间用 ,隔开
Set extends Element> elements = roundEnvironment.getElementsAnnotatedWith(AptAnnotation.class); for (Element element : elements) { if (element.getKind() == ElementKind.CLASS) { // 如果元素是类
classPointerInputChange( val id: PointerId, // 手指Id val uptimeMillis: Long, // 当前手势事件的时间戳 val position: Offset, // 当前手势事件相对组件左上角的位置 val pressed: Boolean, // 当前手势是否按下 val previousUptimeMillis: Long, // 上一次手势事件的时间戳 val previousPosition: Offset, // 上一次手势事件相对组件左上角的位置 val previousPressed: Boolean, // 上一次手势是否按下 val consumed: ConsumedData, // 当前手势是否已被消费 val type: PointerType = PointerType.Touch // 手势类型(鼠标、手指、手写笔、橡皮)
)
API名称
作用
changedToDown
是否已经按下(按下手势已消费则返回false)
changedToDownIgnoreConsumed
是否已经按下(忽略按下手势已消费标记)
changedToUp
是否已经抬起(按下手势已消费则返回false)
changedToUpIgnoreConsumed
是否已经抬起(忽略按下手势已消费标记)
positionChanged
是否位置发生了改变(移动手势已消费则返回false)
positionChangedIgnoreConsumed
是否位置发生了改变(忽略已消费标记)
positionChange
位置改变量(移动手势已消费则返回Offset.Zero)
positionChangeIgnoreConsumed
位置改变量(忽略移动手势已消费标记)
positionChangeConsumed
当前移动手势是否已被消费
anyChangeConsumed
当前按下手势或移动手势是否有被消费
consumeDownChange
消费按下手势
consumePositionChange
消费移动手势
consumeAllChanges
消费按下与移动手势
isOutOfBounds
当前手势是否在固定范围内
这些 API 会在我们自定义手势处理时会被用到。可以发现的是,Compose 通过 PointerEventPass 来定制事件分发流程,在事件分发流程中即使前一个组件先获取了手势信息并进行了消费,后面的组件仍然可以通过带有 IgnoreConsumed 系列 API 来获取到手势信息。这也极大增加了手势操作的可定制性。就好像父组件先把事件消费,希望子组件不要处理这个手势了,但子组件完全可以不用听从父组件的话。
// Output: // first layer, downChange: false // third layer, downChange: true // second layer, downChange: true // first layer Outside // third layer Outside // second layer Outside
awaitFirstDown
awaitFirstDown 将等待第一根手指按下事件时恢复执行,并将手指按下事件返回。分析源码我们可以发现 awaitFirstDown 也使用的是 awaitPointerEvent 实现的,默认使用 Main 模式。
suspendfun AwaitPointerEventScope.awaitFirstDown(
requireUnconsumed: Boolean = true
): PointerInputChange { var event: PointerEvent do {
event = awaitPointerEvent()
} while (
!event.changes.fastAll { if (requireUnconsumed) it.changedToDown() else it.changedToDownIgnoreConsumed()
}
) return event.changes[0]
}
Chisel is a collection of LLDB commands to assist in the debugging of iOS apps 通过github上面说明安装一下 pviews 找所有的视图 pviews -u 查看上一层视图 pvc 打印所有的控制器 pmethods 0x107da5370 打印所有方法 pinternals 0x107da5370 打印所有成员 fvc -v 0x107da5370,根据视图找到控制器 fv
flicker 会让视图闪烁两次
LLDB
search class 搜索对象 methods 0x 方法 b -a 0x02 下断点 sbt 恢复方法符号
cycript
./cycript 开始 ctrl + d 退出 首先要配置cycript,我这里面配置的是moneyDev,因为moneyDev里面包含cycript ./cycript -r 192.168.1.101:6666找到ip地址+:调试端口号默认6666
structstr { int a; int b; int c; int d; int e; int f;
};
structstrgetStr(int a, int b, int c, int d, int e, int f){ structstrstr1;
str1.a = a;
str1.b = b;
str1.c = c;
str1.d = d;
str1.e = e;
str1.f = f; return str1;
}
structstr { int a; int b; int c; int d; int e; int f; int g; int h; int i; int j;
};
structstrgetStr(int a, int b, int c, int d, int e, int f, int g, int h, int i, int j){ structstrstr1;
str1.a = a;
str1.b = b;
str1.c = c;
str1.d = d;
str1.e = e;
str1.f = f;
str1.g = g;
str1.h = h;
str1.i = i;
str1.j = j; return str1;
}
#6.重签名第三方 FrameWorks
TARGET_APP_FRAMEWORKS_PATH="$TARGET_APP_PATH/Frameworks"
if [ -d "$TARGET_APP_FRAMEWORKS_PATH" ];
then
for FRAMEWORK in "$TARGET_APP_FRAMEWORKS_PATH/"*
do
#签名
/usr/bin/codesign --force --sign "$EXPANDED_CODE_SIGN_IDENTITY" "$FRAMEWORK"
done
fi
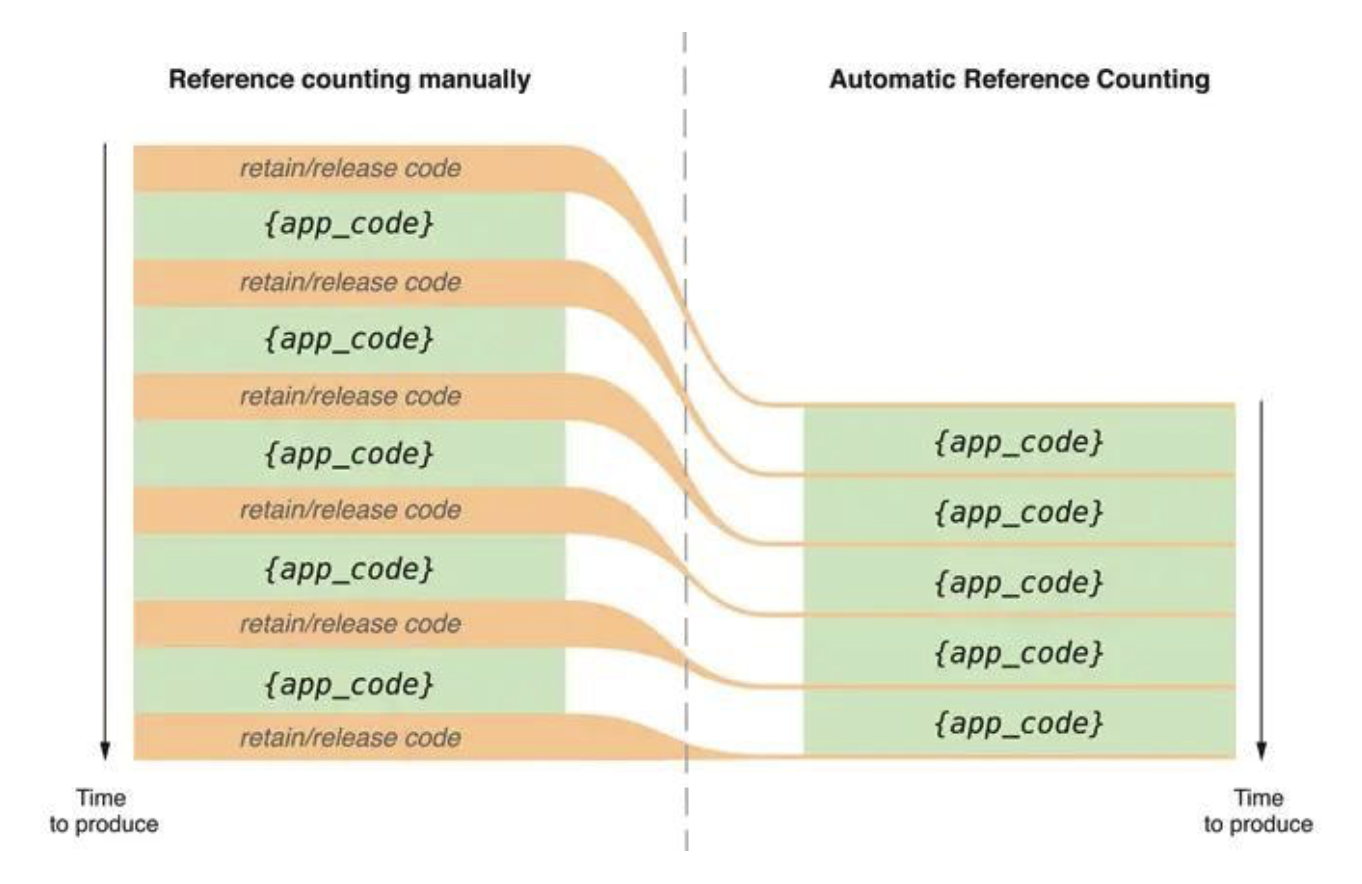
clang - the Clang C, C++, and Objective-C compiler DESCRIPTION clang is a C, C++, and Objective-C compiler which encompasses prepro- cessing, parsing, optimization, code generation, assembly, and linking. Depending on which high-level mode setting is passed, Clang will stop before doing a full link. While Clang is highly integrated, it is important to understand the stages of compilation, to understand how to invoke it. These stages are: Driver The clang executable is actually a small driver which controls the overall execution of other tools such as the compiler, assembler and linker. Typically you do not need to interact with the driver, but you transparently use it to run the other tools. 通过man命令我们看到clang是C、C++、OC的编译器,是一个集合包含了预处理、解析、优化、代码生成、汇编化、链接。
➜ staticLibraryCreat lldb
(lldb) file test
Current executable set to '/Users/binxiao/projects/library/staticLibraryCreat/test' (x86_64).
(lldb) r
Process 2148 launched: '/Users/binxiao/projects/library/staticLibraryCreat/test' (x86_64)
2021-02-13 13:22:49.150091+0800 test[2148:13026772] testApp----
2021-02-13 13:22:49.150352+0800 test[2148:13026772] hp_test----
Process 2148 exited with status = 0 (0x00000000)
libc++abi.dylib: terminating with uncaught exception oftype NSException *** Terminating app due to uncaught exception 'NSInvalidArgumentException', reason: '-[HPTestObject hp_test_additions]: unrecognized selector sent to instance 0x600001048020'
terminating with uncaught exception oftype NSException
///When this method returns true, Clang will turn non-super message sends of /// certain selectors into calls to the corresponding entrypoint: /// alloc => objc_alloc /// allocWithZone:nil=> objc_allocWithZone
这说明方向没有错,最中在CGObjC.cpp中找到了如下代码:
case OMF_alloc: if (isClassMessage &&
Runtime.shouldUseRuntimeFunctionsForAlloc() &&
ResultType->isObjCObjectPointerType()) { // [Foo alloc] -> objc_alloc(Foo) or // [self alloc] -> objc_alloc(self) if (Sel.isUnarySelector() && Sel.getNameForSlot(0) =="alloc") return CGF.EmitObjCAlloc(Receiver, CGF.ConvertType(ResultType)); // [Foo allocWithZone:nil] -> objc_allocWithZone(Foo) or // [self allocWithZone:nil] -> objc_allocWithZone(self) if (Sel.isKeywordSelector() && Sel.getNumArgs() ==1&&
Args.size() ==1&& Args.front().getType()->isPointerType() &&
Sel.getNameForSlot(0) =="allocWithZone") { const llvm::Value* arg = Args.front().getKnownRValue().getScalarVal(); if (isa<llvm::ConstantPointerNull>(arg)) return CGF.EmitObjCAllocWithZone(Receiver,
CGF.ConvertType(ResultType)); return None;
}
} break;
// Read class's info bits all at once for performance //判断当前class或者superclass是否有.cxx_construct构造方法的实现
bool hasCxxCtor = cxxConstruct && cls->hasCxxCtor(); //判断当前class或者superclass是否有.cxx_destruct析构方法的实现
bool hasCxxDtor = cls->hasCxxDtor(); //标记类是否支持优化的isa
bool fast = cls->canAllocNonpointer();
size_t size; //通过内存对齐得到实例大小,extraBytes是由对象所拥有的实例变量决定的。
size = cls->instanceSize(extraBytes); if (outAllocatedSize) *outAllocatedSize = size;
id obj; //对象分配空间 if (zone) {
obj = (id)malloc_zone_calloc((malloc_zone_t *)zone, 1, size);
} else {
obj = (id)calloc(1, size);
} if (slowpath(!obj)) { if (construct_flags & OBJECT_CONSTRUCT_CALL_BADALLOC) { return_objc_callBadAllocHandler(cls);
} return nil;
} //初始化实例isa指针 if (!zone && fast) {
obj->initInstanceIsa(cls, hasCxxDtor);
} else { // Use raw pointer isa on the assumption that they might be // doing something weird with the zone or RR.
obj->initIsa(cls);
}
if (!nonpointer) {
newisa.setClass(cls, this);
} else { ASSERT(!DisableNonpointerIsa); ASSERT(!cls->instancesRequireRawIsa());
#if SUPPORT_INDEXED_ISA ASSERT(cls->classArrayIndex() >0);
newisa.bits = ISA_INDEX_MAGIC_VALUE; // isa.magic is part of ISA_MAGIC_VALUE // isa.nonpointer is part of ISA_MAGIC_VALUE
newisa.has_cxx_dtor = hasCxxDtor;
newisa.indexcls = (uintptr_t)cls->classArrayIndex(); #else
newisa.bits = ISA_MAGIC_VALUE; // isa.magic is part of ISA_MAGIC_VALUE // isa.nonpointer is part of ISA_MAGIC_VALUE # if ISA_HAS_CXX_DTOR_BIT
newisa.has_cxx_dtor = hasCxxDtor; # endif
newisa.setClass(cls, this); #endif
newisa.extra_rc =1;
}
// This write must be performed in a single store in some cases // (for example when realizing a class because other threads // may simultaneously try to use the class). // fixme use atomics here to guarantee single-store and to // guarantee memory order w.r.t. the class index table // ...but not too atomic because we don't want to hurt instantiation
isa = newisa;
}
#if __has_feature(ptrauth_calls) //p10 = _bucketsAndMaybeMask & 0x007ffffffffffffe = buckets and p10, p11, #0x007ffffffffffffe// p10 = x //buckets x16为cls 验证
autdb x10, x16 // auth as early as possible #endif
// w9 = ((_cmd - first_shared_cache_sel) >> hash_shift & hash_mask) #if __has_feature(ptrauth_calls) // bits 63..60 of x11 are the number of bits in hash_mask // bits 59..55 of x11 is hash_shift
作为一个和 Core Audio 打过很长时间交道的工程师,苹果发布 Swift 让我感到兴奋又疑惑。兴奋是因为 Swift 是一个为性能打造的现代编程语言,但是我又不是非常确定函数式编程是否可以应用到 “我的世界”。幸运的是,很多人已经探索和克服了这些问题,所以我决定将我从这些项目中学习到的东西应用到 Swift 编程语言中去。
信号
信号处理的基本当然是信号。在 Swift 中,我可以这样定义信号:
publictypealias Signal = Int -> SampleType
你可以把 Signal 类想象成一个离散时间函数,这个函数会返回一个时间点上的信号值。在大多数信号处理的教科书中,这个会被写做 x[t], 这样一来它就很符合我的世界观了。
现在我们来定义一个给定频率的正弦波:
publicfunc sineWave(sampleRate: Int, frequency: ParameterType) -> Signal { let phi = frequency / ParameterType(sampleRate) return { i in return SampleType(sin(2.0 * ParameterType(i) * phi * ParameterType(M_PI)))
}
}
publicprotocolBlockType { typealias SignalType var inputCount: Int { get } var outputCount: Int { get } var process: [SignalType] -> [SignalType] { get }
publicfunc merge<B: BlockType where B.SignalType == Signal>(lhs: B, rhs: B) -> B { return B(inputCount: lhs.inputCount, outputCount: rhs.outputCount, process: { inputs in let leftOutputs = lhs.process(inputs) var rightInputs: [B.SignalType] = []
let k = lhs.outputCount / rhs.inputCount for i in0..<rhs.inputCount { var inputsToSum: [B.SignalType] = [] for j in0..<k {
inputsToSum.append(leftOutputs[i+(rhs.inputCount*j)])
} let summed = inputsToSum.reduce(NullSignal) { mix($0, $1) }
rightInputs.append(summed)
}