
如何使用Electron集成环信UIKIT
写在前面
环信单群聊 UIKit 是基于环信即时通讯云 IM SDK 开发的一款即时通讯 React UI 组件库,本篇文章介绍如何在Electron中如何集成UIKit,采用框架Electron-vite-react
---
准备工作
1.已经在环信即时通讯云控制台创建了有效的环信即时通讯 IM 开发者账号,并获取了App Key。
2.了解并可以创建Electron-vite-react项目
3.了解UIkit各功能以及api调用
---
开始集成
第一步:创建一个Electron项目进度10%
Electron-vite官网有详细的教程,此处不做过多赘述,仅以当前示例项目为参考集成,更多详情指路官网
yarn create @quick-start/electron electronReact --template react第二步:安装依赖进度15%
yarn install第三步:启动项目进度20%
yarn run dev到这一步我们可以得到下图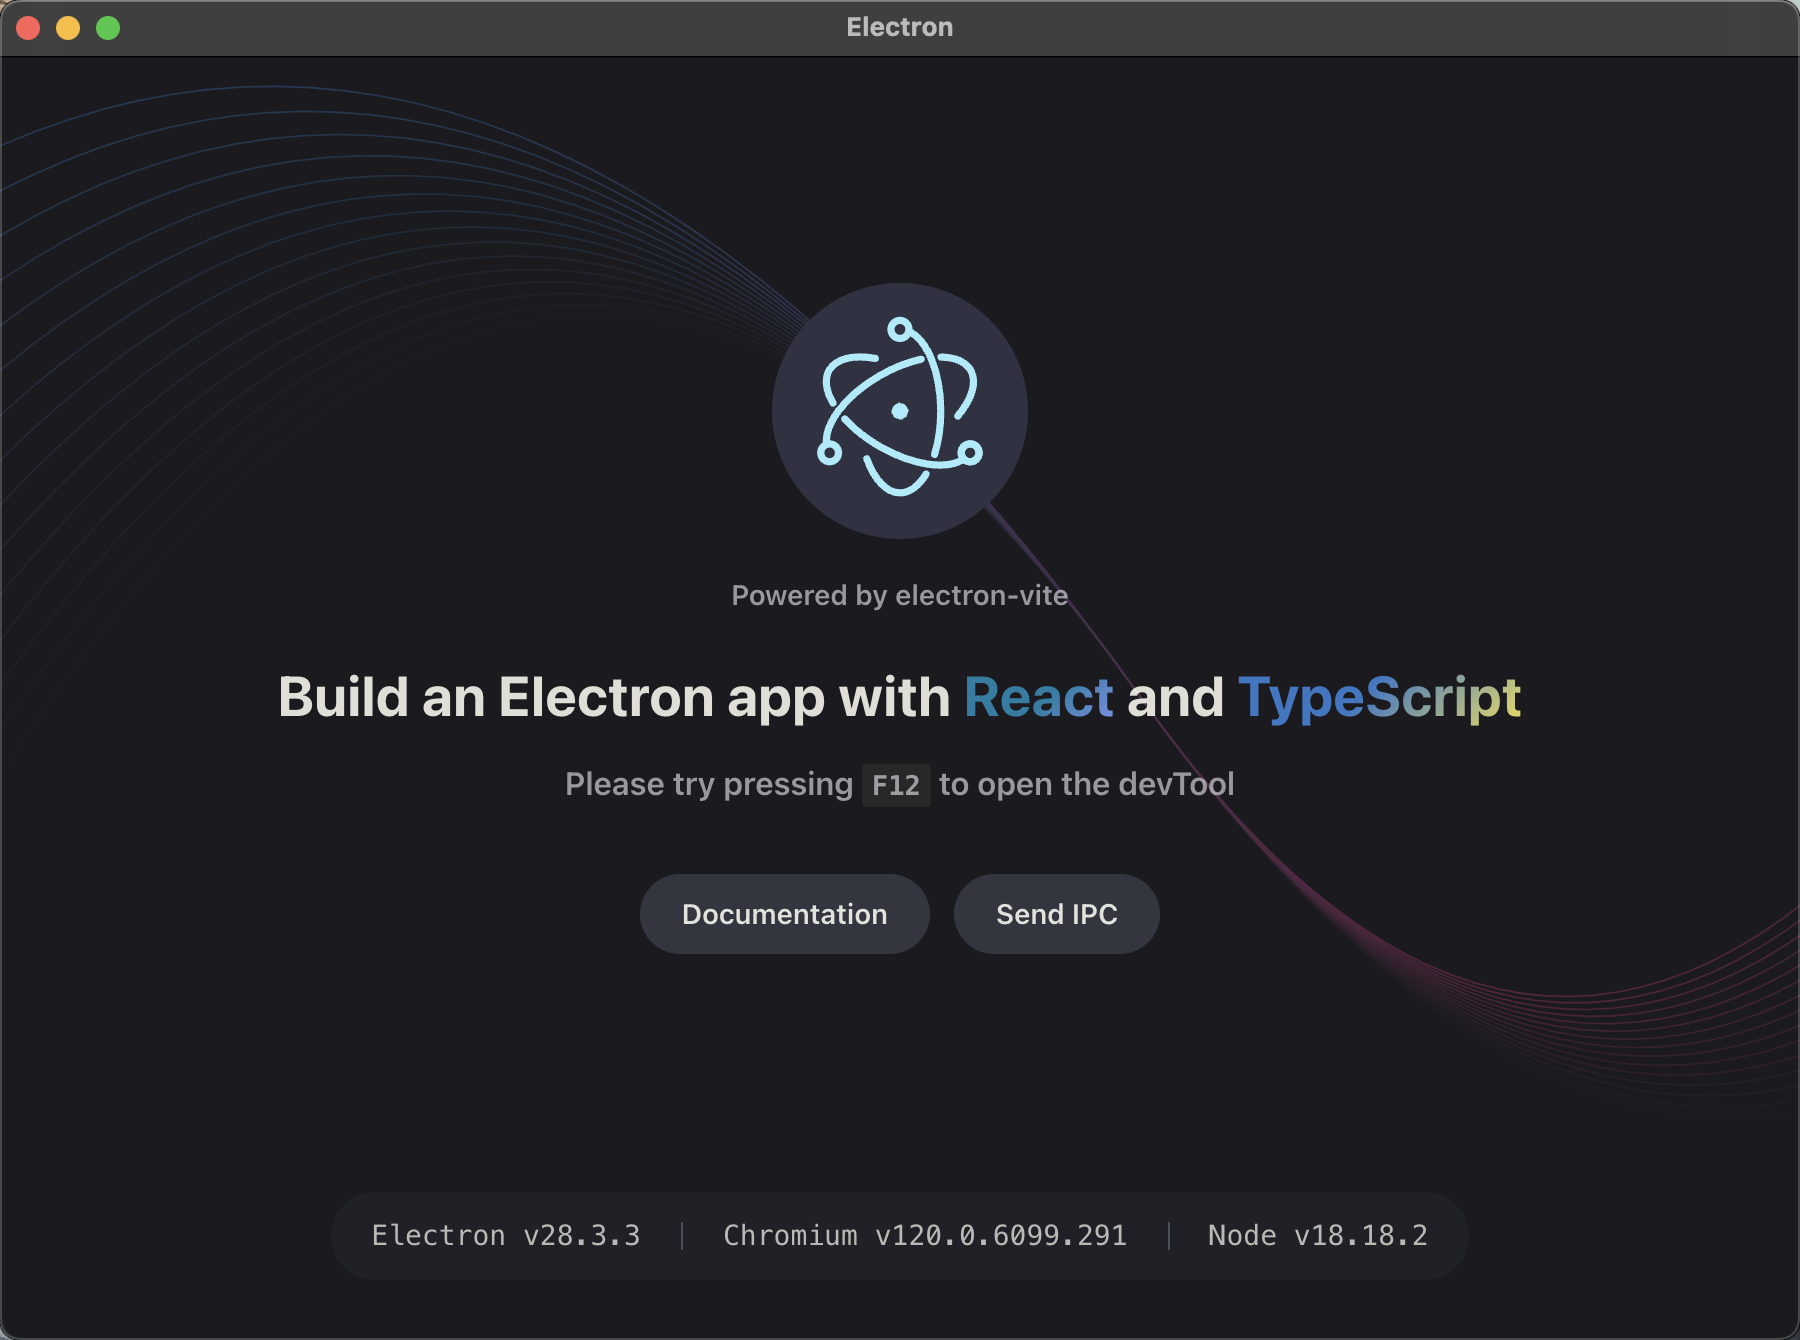
你的目录结构如下图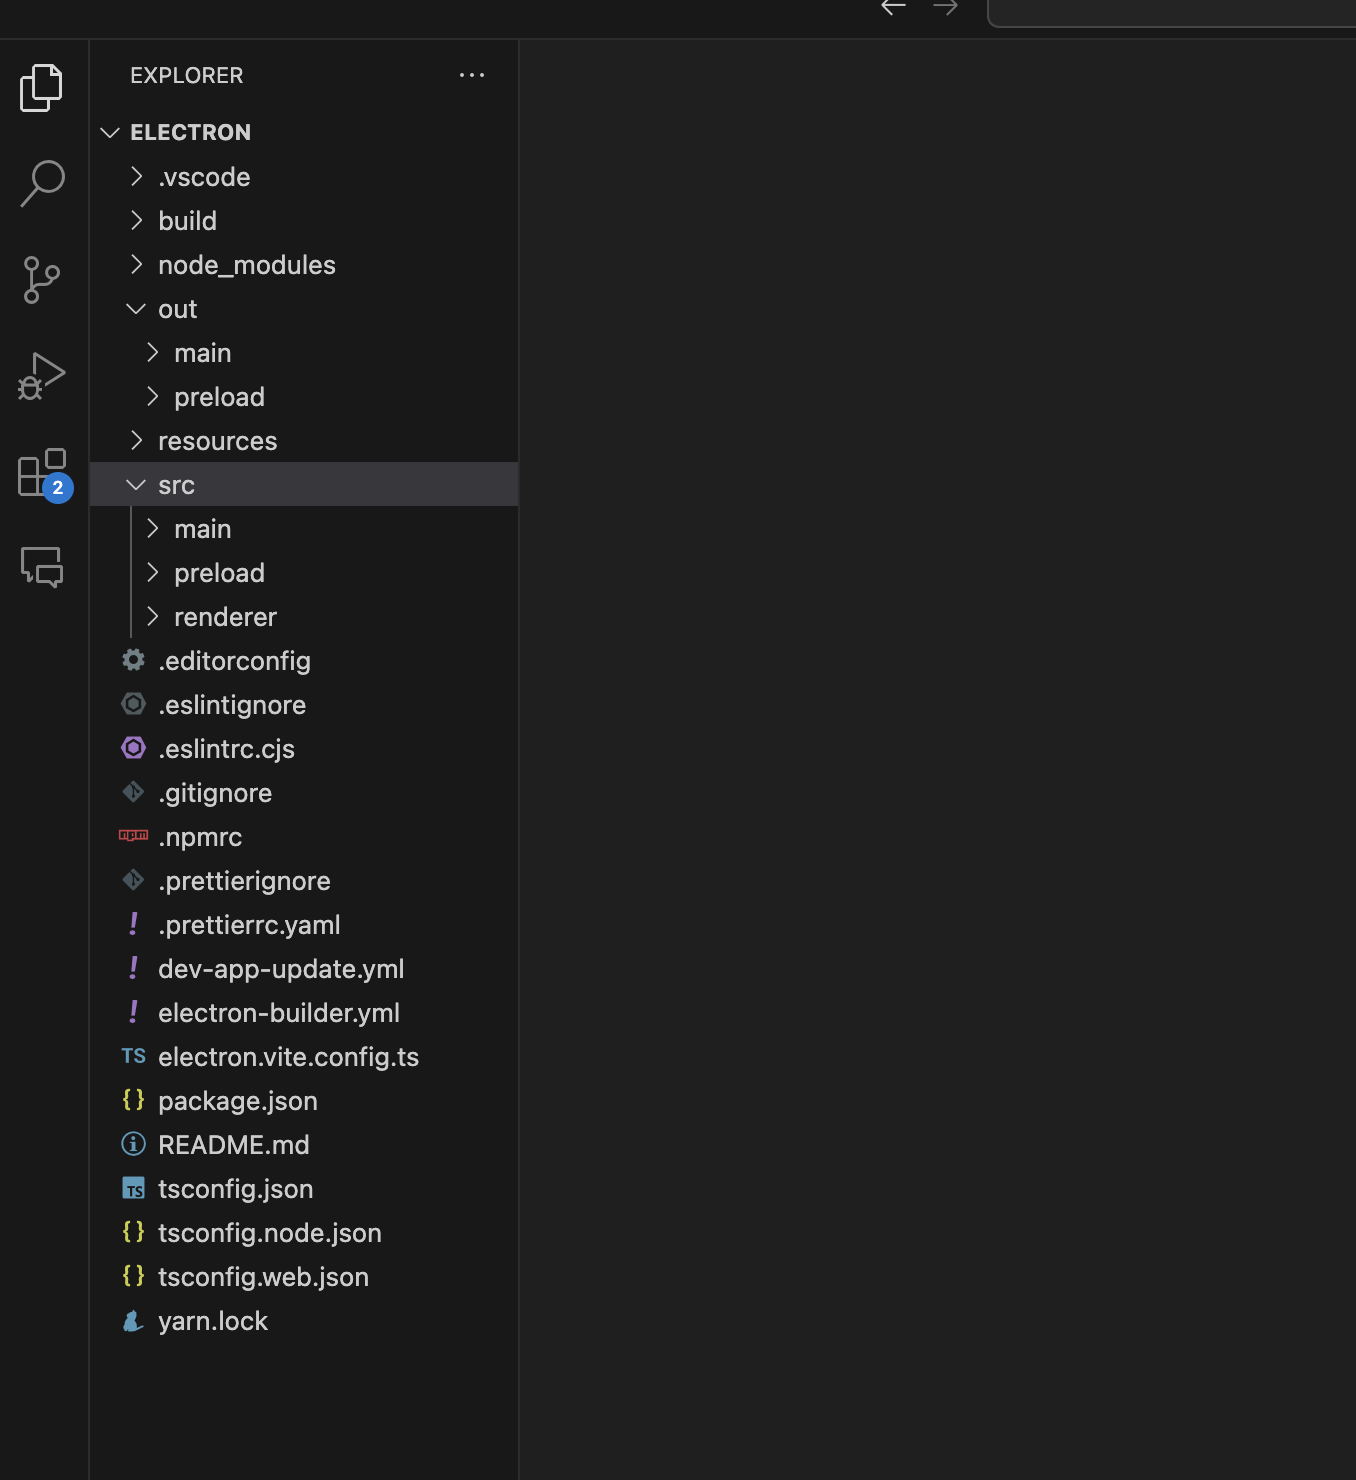
第四步:安装UIKit进度50%
下载easemob-chat-uikit
使用 npm 安装 easemob-chat-uikit 包
npm install easemob-chat-uikit --save使用 yarn 安装 easemob-chat-uikit 包
yarn add easemob-chat-uikit第五步:引入UIKit组件进度80%
1、删除App.tsx自带的内容,在App.tsx中引入UIKit组件
import {
  Provider as UIKitProvider,
  Chat,
  ConversationList,
  useClient
} from 'easemob-chat-uikit'
import 'easemob-chat-uikit/style.css'
import { useEffect } from 'react'
import './App.css'
const ChatApp = () => {
  const client = useClient()
  useEffect(() => {
    client &&
      client
        .open({
          user: 'userId',
          pwd: 'pwd'
        })
        .then((res) => {
          console.log('get token success', res)
        })
  }, [client])
  return (
    <div className="app_container">
      <div className="conversation_container">
        <ConversationList />
      </div>
      <div className="chat_container">
        <Chat />
      </div>
    </div>
  )
}
function App(): JSX.Element {
  return (
    <UIKitProvider
      initConfig={{
        appKey: 'your app key'
      }}
    >
      <ChatApp />
    </UIKitProvider>
  )
}

export default Appbody {
display: flex;
flex-direction: column;
font-family:
Roboto,
-apple-system,
BlinkMacSystemFont,
'Helvetica Neue',
'Segoe UI',
'Oxygen',
'Ubuntu',
'Cantarell',
'Open Sans',
sans-serif;
color: #86a5b1;
background-color: #2f3241;
}
* {
padding: 0;
margin: 0;
}
ul {
list-style: none;
}
code {
font-weight: 600;
padding: 3px 5px;
border-radius: 2px;
background-color: #26282e;
font-family:
ui-monospace,
SFMono-Regular,
SF Mono,
Menlo,
Consolas,
Liberation Mono,
monospace;
font-size: 85%;
}
a {
color: #9feaf9;
font-weight: 600;
cursor: pointer;
text-decoration: none;
outline: none;
}
a:hover {
border-bottom: 1px solid;
}
.container {
flex: 1;
display: flex;
flex-direction: column;
max-width: 840px;
margin: 0 auto;
padding: 15px 30px 0 30px;
}
.versions {
margin: 0 auto;
float: none;
clear: both;
overflow: hidden;
font-family: 'Menlo', 'Lucida Console', monospace;
color: #c2f5ff;
line-height: 1;
transition: all 0.3s;
}
.versions li {
display: block;
float: left;
border-right: 1px solid rgba(194, 245, 255, 0.4);
padding: 0 20px;
font-size: 13px;
opacity: 0.8;
}
.versions li:last-child {
border: none;
}
.hero-logo {
margin-top: -0.4rem;
transition: all 0.3s;
}
@media (max-width: 840px) {
.versions {
display: none;
}
.hero-logo {
margin-top: -1.5rem;
}
}
.hero-text {
font-weight: 400;
color: #c2f5ff;
text-align: center;
margin-top: -0.5rem;
margin-bottom: 10px;
}
@media (max-width: 660px) {
.hero-logo {
display: none;
}
.hero-text {
margin-top: 20px;
}
}
.hero-tagline {
text-align: center;
margin-bottom: 14px;
}
.links {
display: flex;
align-items: center;
justify-content: center;
margin-bottom: 24px;
font-size: 18px;
font-weight: 500;
}
.links a {
font-weight: 500;
}
.links .link-item {
padding: 0 4px;
}
.features {
display: flex;
flex-wrap: wrap;
margin: -6px;
}
.features .feature-item {
width: 33.33%;
box-sizing: border-box;
padding: 6px;
}
.features article {
background-color: rgba(194, 245, 255, 0.1);
border-radius: 8px;
box-sizing: border-box;
padding: 12px;
height: 100%;
}
.features span {
color: #d4e8ef;
word-break: break-all;
}
.features .title {
font-size: 17px;
font-weight: 500;
color: #c2f5ff;
line-height: 22px;
overflow: hidden;
text-overflow: ellipsis;
white-space: nowrap;
}
.features .detail {
font-size: 14px;
font-weight: 500;
line-height: 22px;
margin-top: 6px;
}
@media (max-width: 660px) {
.features .feature-item {
width: 50%;
}
}
@media (max-width: 480px) {
.links {
flex-direction: column;
line-height: 32px;
}
.links .link-dot {
display: none;
}
.features .feature-item {
width: 100%;
}
}.app_container {
width: calc(100%);
height: 100vh;
display: flex;
}
.conversation_container {
width: 30%;
}
.chat_container {
width: 70%;
}
第六步:解决问题`进度99%`
在第五步执行完毕之后发现调试器有如下图报错

经查阅资料,发现是Electron内容安全策略在搞鬼,并提供了解决方案
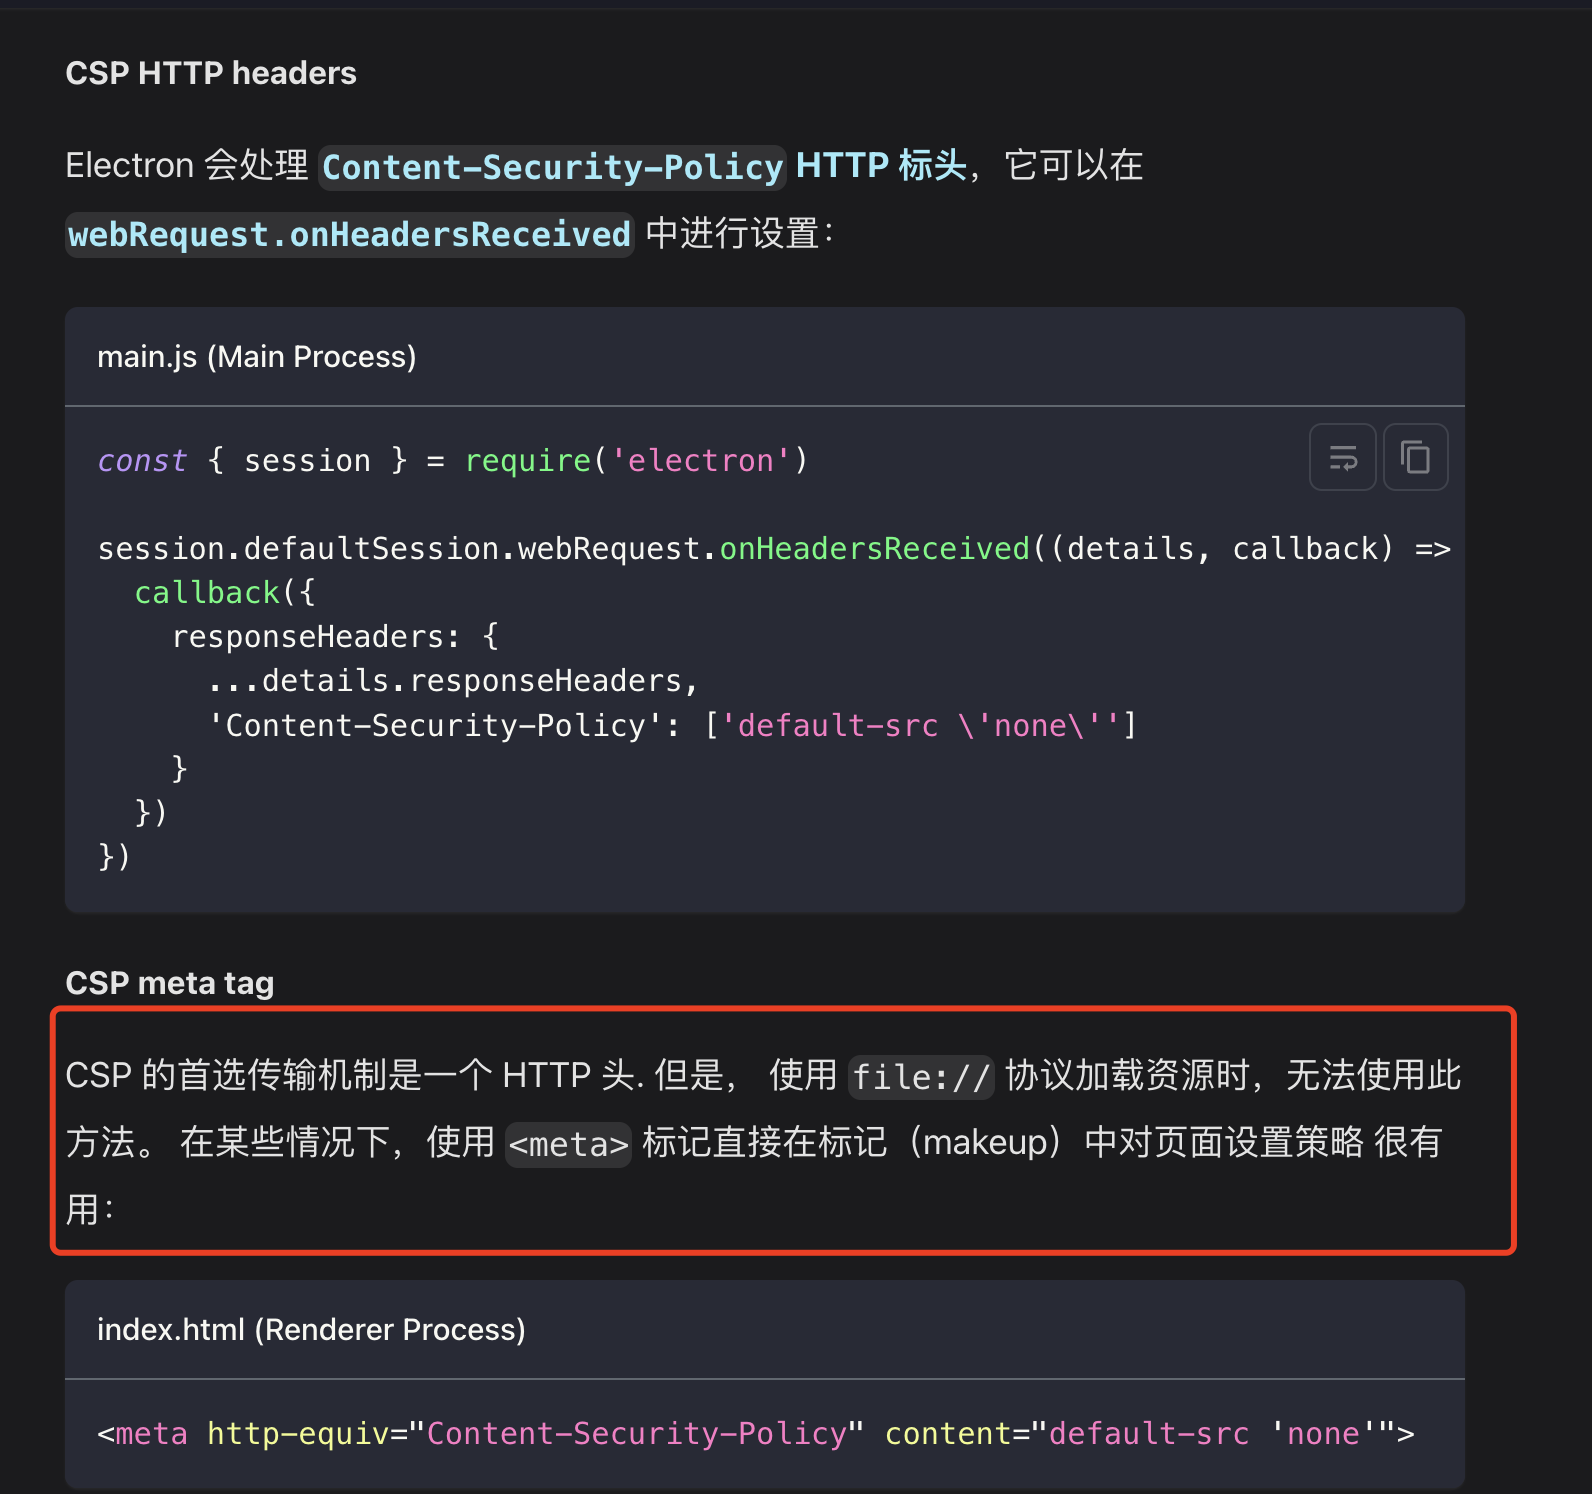
接下来我们就需要在src/renderer/index.html中更改meta标签
同样out/renderer/index.html也需要更改meta标签
<meta
http-equiv="Content-Security-Policy"
content="font-src 'self' data:; img-src 'self' data:; default-src 'self'; connect-src * ws://* wss://*; script-src 'self' 'unsafe-eval'; style-src 'self' 'unsafe-inline'"
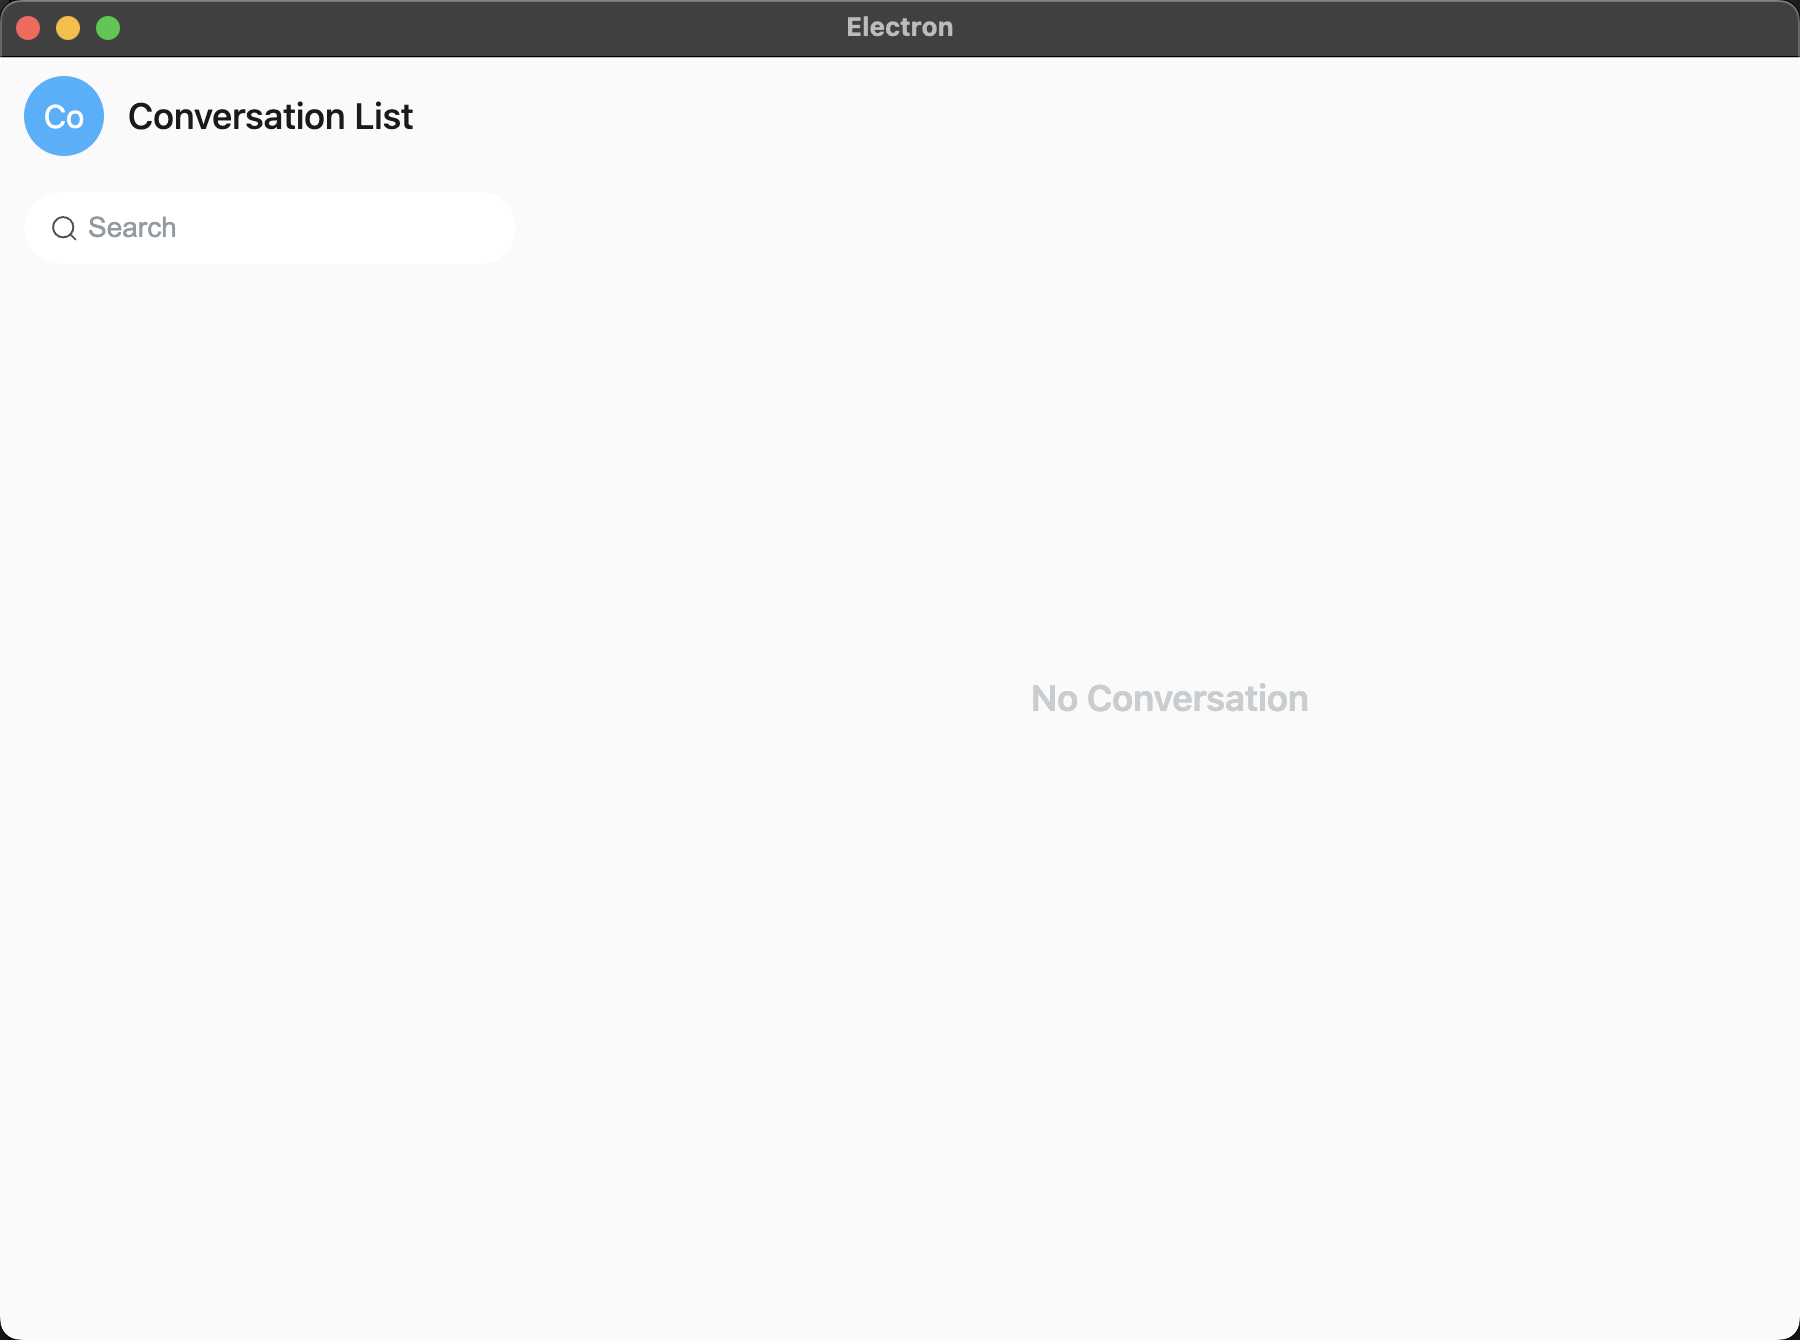
/>接下来保存代码并运行你将得到下图
第七步:发送消息进度100%
点击好友并发送一条消息,如下图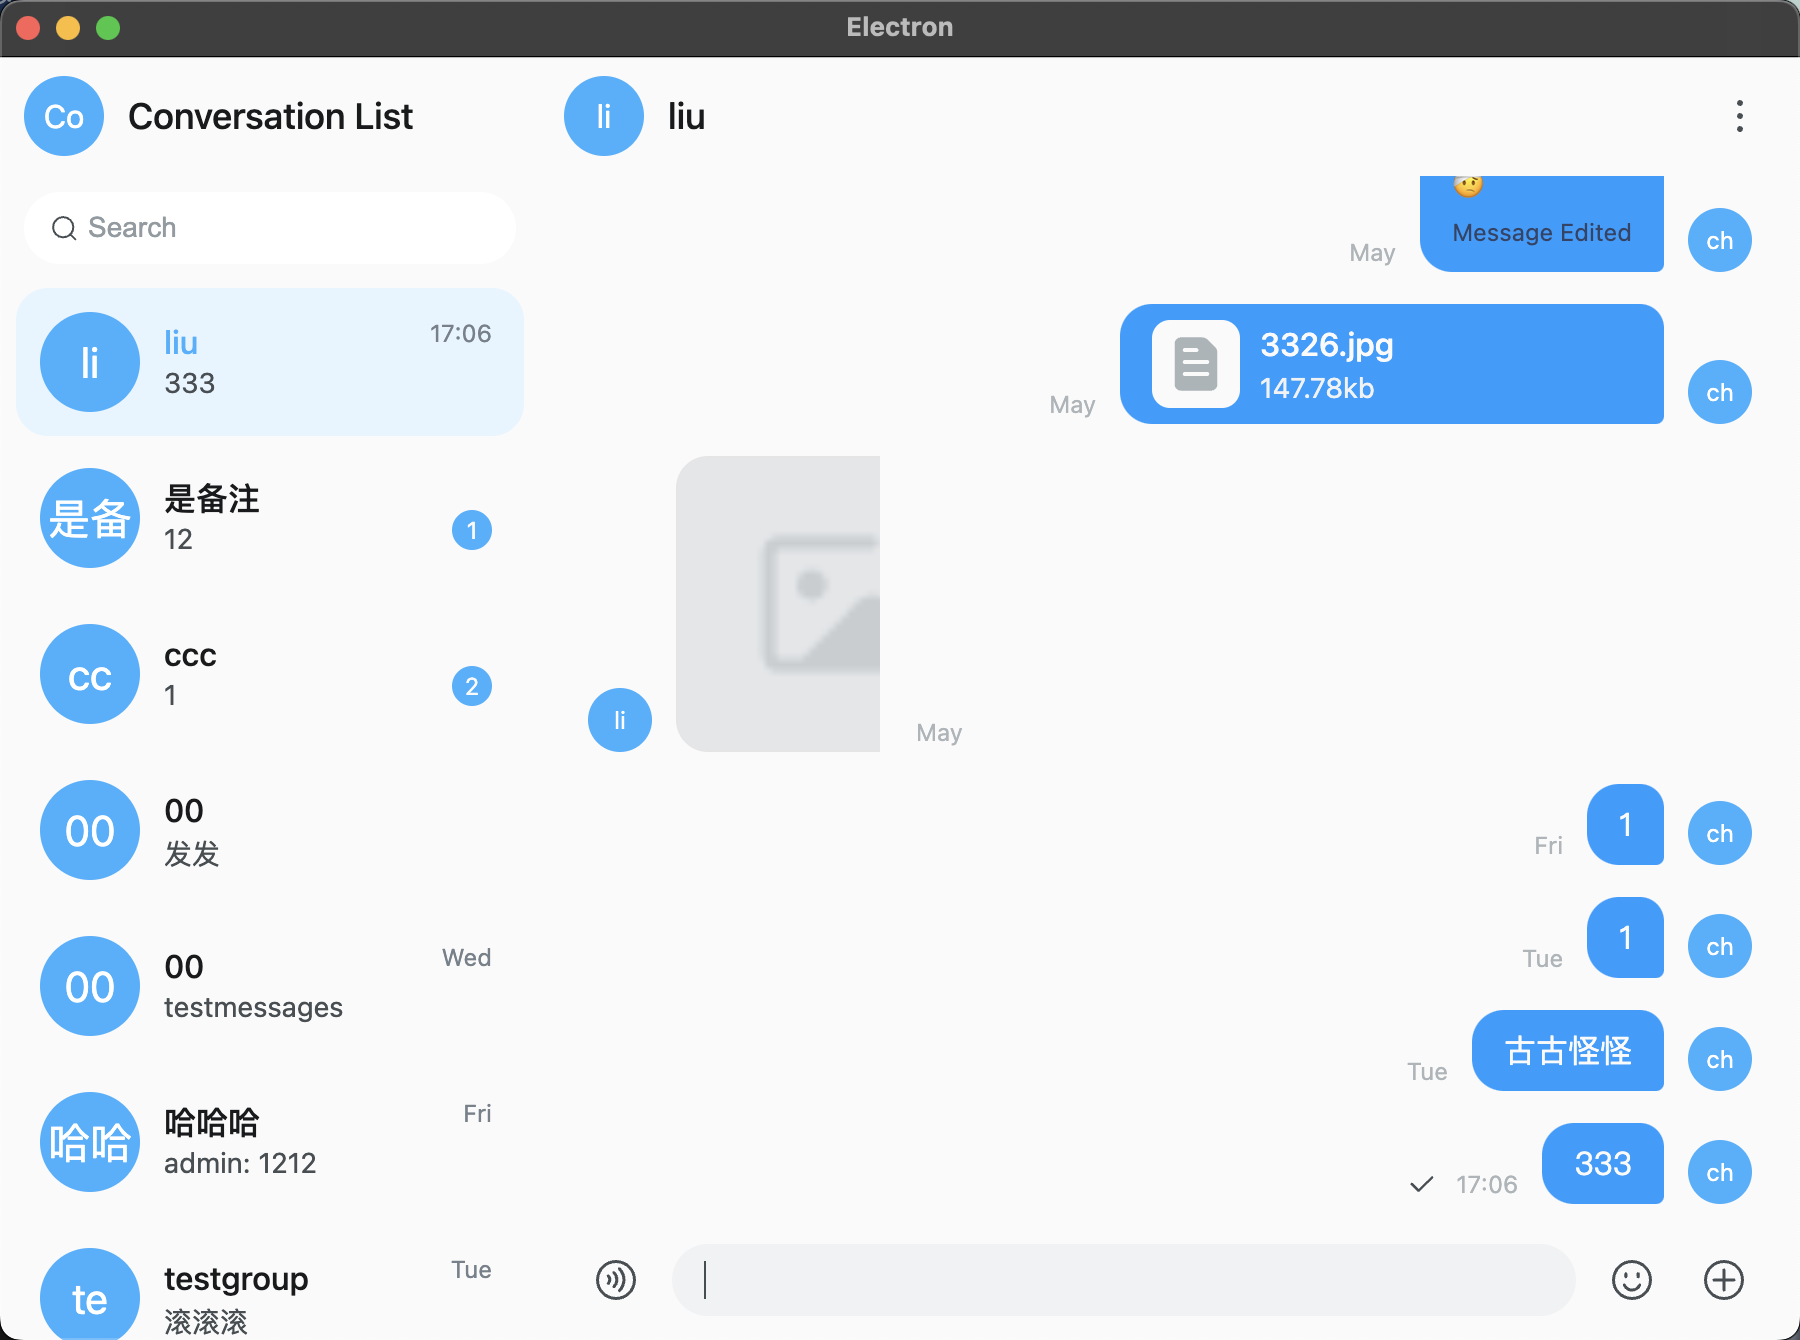
恭喜你集成完毕~
总结:
通过以上步骤,你已经成功在Electron中集成了环信单聊 UIKit 并实现了基本的即时通讯功能,接下来继续根据 UIKit 提供的组件和 API 文档进行进一步开发吧
