
Android 第三方RoundedImageView设置各种圆形、方形头像
Android 自定义CoolImageView实现QQ首页背景图片动画效果
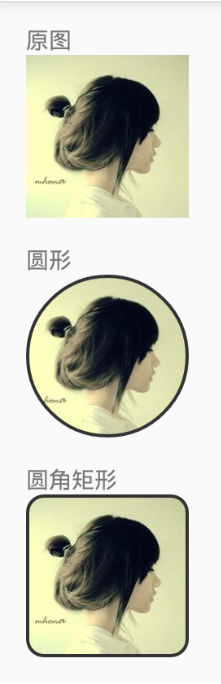
一.第三方RoundedImageView
1.在Android Studio中,可进入模块设置中添加库依赖。 进入Module结构设置添加库依赖 ,输入RoundedImageView然后搜索添加
2.在Moudle的build.gradle中添加如下代码,添加完之后在Build中进行下Make Module操作(编译下Module),使自己添加的依赖生效
repositories {


    mavenCentral()


}


dependencies {


    compile 'com.makeramen:roundedimageview:2.2.1'

}
3.添加相关属性:
控件属性:
riv_border_width: 边框宽度
riv_border_color: 边框颜色
riv_oval: 是否圆形
riv_corner_radius: 圆角弧度
riv_corner_radius_top_left:左上角弧度
riv_corner_radius_top_right: 右上角弧度
riv_corner_radius_bottom_left:左下角弧度
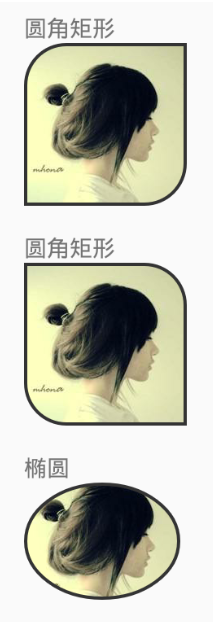
riv_corner_radius_bottom_right:右下角弧度4.示例布局:
 <com.makeramen.roundedimageview.RoundedImageView


          android:layout_width="wrap_content"


          android:layout_height="wrap_content"


          android:src="@mipmap/avatar"


          app:riv_border_color="#333333"


          app:riv_border_width="2dp"


          app:riv_oval="true" />


    <com.makeramen.roundedimageview.RoundedImageView


          xmlns:app="http://schemas.android.com/apk/res-auto"


          android:layout_width="wrap_content"


          android:layout_height="wrap_content"


          android:scaleType="fitCenter"


          android:src="@mipmap/avatar"


          app:riv_border_color="#333333"


          app:riv_border_width="2dp"


          app:riv_corner_radius="10dp"


          app:riv_mutate_background="true"


          app:riv_oval="false"


          app:riv_tile_mode="repeat" />


    <com.makeramen.roundedimageview.RoundedImageView


          android:layout_width="wrap_content"


          android:layout_height="wrap_content"


          android:scaleType="fitCenter"


          android:src="@mipmap/avatar"


          app:riv_border_color="#333333"


          app:riv_border_width="2dp"


          app:riv_corner_radius_top_left="25dp"


          app:riv_corner_radius_bottom_right="25dp"


          app:riv_mutate_background="true"


          app:riv_oval="false"


          app:riv_tile_mode="repeat" />


   <com.makeramen.roundedimageview.RoundedImageView


          android:layout_width="wrap_content"


          android:layout_height="wrap_content"


          android:scaleType="fitCenter"


          android:src="@mipmap/avatar"


          app:riv_border_color="#333333"


          app:riv_border_width="2dp"


          app:riv_corner_radius_top_right="25dp"


          app:riv_corner_radius_bottom_left="25dp"


          app:riv_mutate_background="true"


          app:riv_oval="false"


          app:riv_tile_mode="repeat" />


   <com.makeramen.roundedimageview.RoundedImageView


          android:layout_width="96dp"


          android:layout_height="72dp"


          android:scaleType="center"


          android:src="@mipmap/avatar"


          app:riv_border_color="#333333"


          app:riv_border_width="2dp"


          app:riv_corner_radius="25dp"


          app:riv_mutate_background="true"


          app:riv_oval="true"


          app:riv_tile_mode="repeat" />
 <com.makeramen.roundedimageview.RoundedImageView


            android:id="@+id/imCompanyHeadItem"


            android:layout_width="50dp"


            android:layout_marginTop="10dp"


            android:layout_marginRight="6.5dp"


            android:layout_marginLeft="6.5dp"


            android:src="@drawable/head_home"


            android:layout_gravity="center"


            android:layout_height="50dp"


            app:riv_border_color="@color/_c7ced8"


            app:riv_border_width="1dp"


            app:riv_corner_radius_top_left="5dp"


            app:riv_corner_radius_bottom_right="5dp"


            app:riv_corner_radius_bottom_left="5dp"


            app:riv_corner_radius_top_right="5dp"


            app:riv_mutate_background="true"


            app:riv_oval="false"


            app:riv_tile_mode="repeat"/>
二.自定义RoundImageView

1.布局:
 <com.iruiyou.pet.utils.RoundImageView


                        android:id="@+id/headIv"


                        android:layout_width="125dp"


                        android:layout_height="125dp"


                        android:layout_marginTop="92dp"


                        android:src="@drawable/head_home"


                        loonggg:border_incolor="#000fff"


                        loonggg:border_outcolor="#fff000"


                        loonggg:border_width="10dp"


                        app:layout_constraintLeft_toLeftOf="parent"


                        app:layout_constraintRight_toRightOf="parent"


                        app:layout_constraintTop_toTopOf="parent"/>
2.自定义类:
import android.content.Context;

import android.content.res.TypedArray;

import android.graphics.Bitmap;

import android.graphics.Canvas;

import android.graphics.Paint;

import android.graphics.PorterDuff;

import android.graphics.PorterDuffXfermode;

import android.graphics.Rect;

import android.graphics.drawable.BitmapDrawable;

import android.graphics.drawable.Drawable;

import android.graphics.drawable.NinePatchDrawable;

import android.util.AttributeSet;

import android.widget.ImageView;

import com.iruiyou.pet.R;


/**


 *


 * @author sgf


 * 自定义圆形头像


 *


 */

public class RoundImageView extends ImageView {

private int mBorderThickness = 0;

private Context mContext;

private int defaultColor = 0xFFFFFFFF;

// 外圆边框颜色

private int mBorderOutsideColor = 0;

// 内圆边框颜色

private int mBorderInsideColor = 0;

// RoundImageView控件默认的长、宽

private int defaultWidth = 0;

private int defaultHeight = 0;


public RoundImageView(Context context) {

super(context);


        mContext = context;


    }


public RoundImageView(Context context, AttributeSet attrs) {

super(context, attrs);


        mContext = context;

// 设置RoundImageView的属性值,比如颜色,宽度等


        setRoundImageViewAttributes(attrs);


    }


public RoundImageView(Context context, AttributeSet attrs, int defStyle) {

super(context, attrs, defStyle);


        mContext = context;


        setRoundImageViewAttributes(attrs);


    }


// 从attr.xml文件中获取属性值,并给RoundImageView设置

private void setRoundImageViewAttributes(AttributeSet attrs) {


        TypedArray a = mContext.obtainStyledAttributes(attrs,


                R.styleable.round_image_view);


        mBorderThickness = a.getDimensionPixelSize(


                R.styleable.round_image_view_border_width, 0);


        mBorderOutsideColor = a.getColor(


                R.styleable.round_image_view_border_outcolor, defaultColor);


        mBorderInsideColor = a.getColor(


                R.styleable.round_image_view_border_incolor, defaultColor);


        a.recycle();


    }


// 具体解释:比如我自定义一个控件,怎么实现呢,以RoundImageView为例,首先是继承ImageView,然后实现其构造函数,在构造函数中,获取attr中的属性值(再次解释:这里获取的具体的这个属性的值是怎么来的呢?比如颜色和宽度,这个在attr.xml中定义了相关的名字,而在使用RoundImageView的xml布局文件中,我们会设置其值,这里需要用的值,就是从那里设置的),并设置在本控件中,然后继承onDraw方法,画出自己想要的图形或者形状即可

/**


     * 这个是继承的父类的onDraw方法


     *


     * onDraw和下面的方法不用管,基本和学习自定义没关系,就是实现怎么画圆的,你可以改变下面代码试着画三角形头像,哈哈


     */

@Override

protected void onDraw(Canvas canvas) {


        Drawable drawable = getDrawable();

if (drawable == null) {

return;


        }

if (getWidth() == 0 || getHeight() == 0) {

return;


        }

this.measure(0, 0);

if (drawable.getClass() == NinePatchDrawable.class)

return;


        Bitmap b = ((BitmapDrawable) drawable).getBitmap();


        Bitmap bitmap = b.copy(Bitmap.Config.ARGB_8888, true);

if (defaultWidth == 0) {


            defaultWidth = getWidth();


        }

if (defaultHeight == 0) {


            defaultHeight = getHeight();


        }

int radius = 0;

// 这里的判断是如果内圆和外圆设置的颜色值不为空且不是默认颜色,就定义画两个圆框,分别为内圆和外圆边框

if (mBorderInsideColor != defaultColor


                && mBorderOutsideColor != defaultColor) {


            radius = (defaultWidth < defaultHeight ? defaultWidth


                    : defaultHeight) / 2 - 2 * mBorderThickness;

// 画内圆


            drawCircleBorder(canvas, radius + mBorderThickness / 2,


                    mBorderInsideColor);

// 画外圆


            drawCircleBorder(canvas, radius + mBorderThickness


                    + mBorderThickness / 2, mBorderOutsideColor);


        } else if (mBorderInsideColor != defaultColor


                && mBorderOutsideColor == defaultColor) {// 这里的是如果内圆边框不为空且颜色值不是默认值,就画一个内圆的边框


            radius = (defaultWidth < defaultHeight ? defaultWidth


                    : defaultHeight) / 2 - mBorderThickness;


            drawCircleBorder(canvas, radius + mBorderThickness / 2,


                    mBorderInsideColor);


        } else if (mBorderInsideColor == defaultColor


                && mBorderOutsideColor != defaultColor) {// 这里的是如果外圆边框不为空且颜色值不是默认值,就画一个外圆的边框


            radius = (defaultWidth < defaultHeight ? defaultWidth


                    : defaultHeight) / 2 - mBorderThickness;


            drawCircleBorder(canvas, radius + mBorderThickness / 2,


                    mBorderOutsideColor);


        } else {// 这种情况是没有设置属性颜色的情况下,即没有边框的情况


            radius = (defaultWidth < defaultHeight ? defaultWidth


                    : defaultHeight) / 2;


        }


        Bitmap roundBitmap = getCroppedRoundBitmap(bitmap, radius);


        canvas.drawBitmap(roundBitmap, defaultWidth / 2 - radius, defaultHeight


                / 2 - radius, null);


    }


/**


     * 获取裁剪后的圆形图片


     *


     * @param bmp


     * @param radius


     *            半径


     * @return


     */

public Bitmap getCroppedRoundBitmap(Bitmap bmp, int radius) {


        Bitmap scaledSrcBmp;

int diameter = radius * 2;

// 为了防止宽高不相等,造成圆形图片变形,因此截取长方形中处于中间位置最大的正方形图片

int bmpWidth = bmp.getWidth();

int bmpHeight = bmp.getHeight();

int squareWidth = 0, squareHeight = 0;

int x = 0, y = 0;


        Bitmap squareBitmap;

if (bmpHeight > bmpWidth) {// 高大于宽


            squareWidth = squareHeight = bmpWidth;


            x = 0;


            y = (bmpHeight - bmpWidth) / 2;

// 截取正方形图片


            squareBitmap = Bitmap.createBitmap(bmp, x, y, squareWidth,


                    squareHeight);


        } else if (bmpHeight < bmpWidth) {// 宽大于高


            squareWidth = squareHeight = bmpHeight;


            x = (bmpWidth - bmpHeight) / 2;


            y = 0;


            squareBitmap = Bitmap.createBitmap(bmp, x, y, squareWidth,


                    squareHeight);


        } else {


            squareBitmap = bmp;


        }

if (squareBitmap.getWidth() != diameter


                || squareBitmap.getHeight() != diameter) {


            scaledSrcBmp = Bitmap.createScaledBitmap(squareBitmap, diameter,


                    diameter, true);


        } else {


            scaledSrcBmp = squareBitmap;


        }


        Bitmap output = Bitmap.createBitmap(scaledSrcBmp.getWidth(),


                scaledSrcBmp.getHeight(), Bitmap.Config.ARGB_8888);


        Canvas canvas = new Canvas(output);


        Paint paint = new Paint();


        Rect rect = new Rect(0, 0, scaledSrcBmp.getWidth(),


                scaledSrcBmp.getHeight());


        paint.setAntiAlias(true);


        paint.setFilterBitmap(true);


        paint.setDither(true);


        canvas.drawARGB(0, 0, 0, 0);


        canvas.drawCircle(scaledSrcBmp.getWidth() / 2,


                scaledSrcBmp.getHeight() / 2, scaledSrcBmp.getWidth() / 2,


                paint);


        paint.setXfermode(new PorterDuffXfermode(PorterDuff.Mode.SRC_IN));


        canvas.drawBitmap(scaledSrcBmp, rect, rect, paint);


        bmp = null;


        squareBitmap = null;


        scaledSrcBmp = null;

return output;


    }


/**


     * 画边缘的圆,即内圆或者外圆


     */

private void drawCircleBorder(Canvas canvas, int radius, int color) {


        Paint paint = new Paint();

/* 去锯齿 */


        paint.setAntiAlias(true);


        paint.setFilterBitmap(true);


        paint.setDither(true);


        paint.setColor(color);

/* 设置paint的 style 为STROKE:空心 */


        paint.setStyle(Paint.Style.STROKE);

/* 设置paint的外框宽度 */


        paint.setStrokeWidth(mBorderThickness);


        canvas.drawCircle(defaultWidth / 2, defaultHeight / 2, radius, paint);


    }


}
3.res--values--attrs.xml文件
<?xml version="1.0" encoding="utf-8"?>

<resources>


<declare-styleable name="round_image_view">

<attr name="border_width" format="dimension" />

<attr name="border_incolor" format="color" />

<attr name="border_outcolor" format="color"></attr>

</declare-styleable>


</resources>
三.第三方NiceImageView
1.效果图如下:
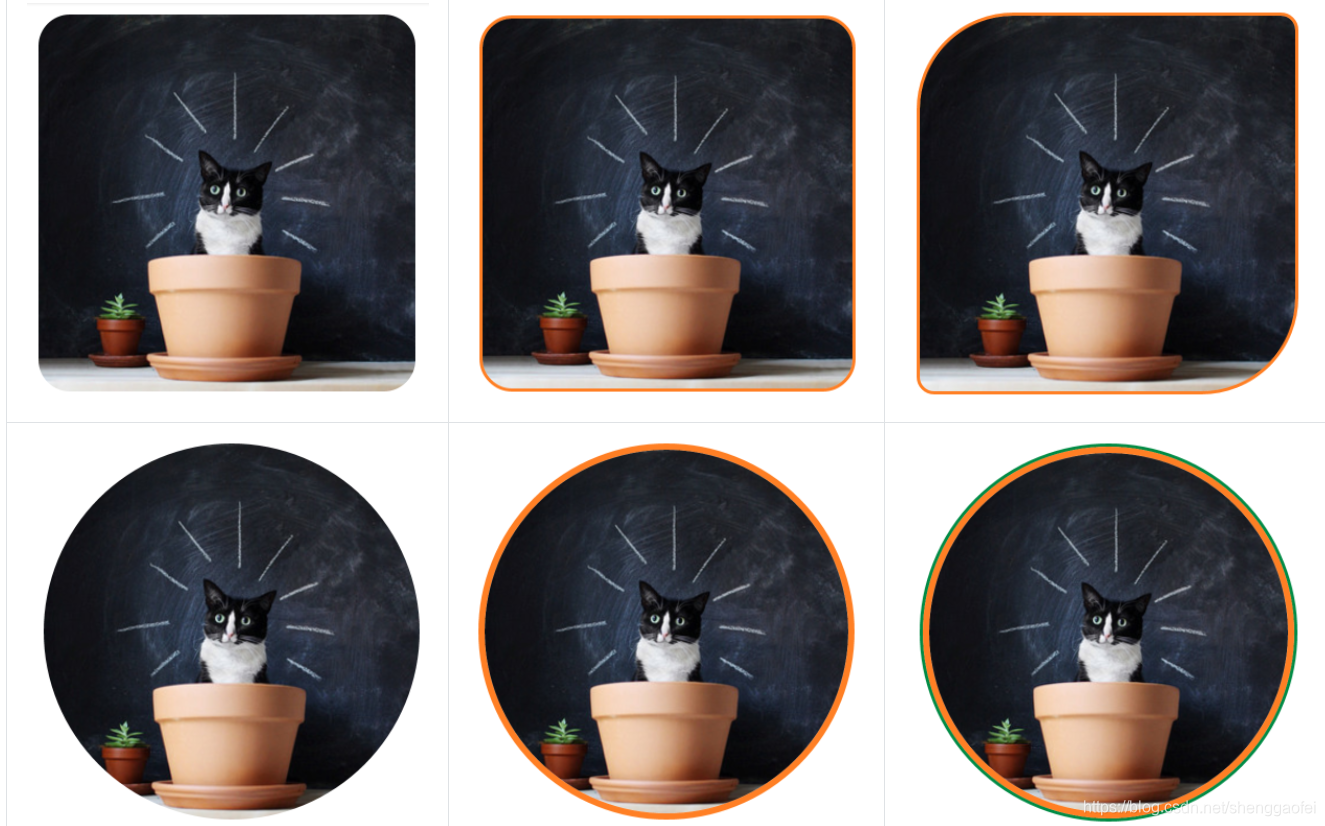
2.特点:
基于AppCompatImageView扩展
支持圆角、圆形显示
可绘制边框,圆形时可绘制内外两层边框
支持边框不覆盖图片
可绘制遮罩
3.基本用法:
1. 添加JitPack仓库 在项目根目录下的 build.gradle 中添加仓库:
allprojects {


    repositories {


        ...


        maven { url "https://jitpack.io" }


    }


}
2. 添加项目依赖
dependencies {

implementation 'com.github.SheHuan:NiceImageView:1.0.5'


}
3. 在布局文件中添加CornerLabelView
<com.shehuan.niv.NiceImageView


    android:layout_width="200dp"


    android:layout_height="200dp"


    android:layout_marginTop="10dp"


    android:src="@drawable/cat"


    app:border_color="#FF7F24"


    app:border_width="4dp"


    app:is_circle="true" />
4.支持的属性、方法
| 属性名 | 含义 | 默认值 | 对应方法 |
|---|---|---|---|
| is_circle | 是否显示为圆形(默认为矩形) | false | isCircle() |
| corner_top_left_radius | 左上角圆角半径 | 0dp | setCornerTopLeftRadius() |
| corner_top_right_radius | 右上角圆角半径 | 0dp | setCornerTopRightRadius() |
| corner_bottom_left_radius | 左下角圆角半径 | 0dp | setCornerBottomLeftRadius() |
| corner_bottom_right_radius | 右下角圆角半径 | 0dp | setCornerBottomRightRadius() |
| corner_radius | 统一设置四个角的圆角半径 | 0dp | setCornerRadius() |
| border_width | 边框宽度 | 0dp | setBorderWidth() |
| border_color | 边框颜色 | #ffffff | setBorderColor() |
| inner_border_width | 相当于内层边框(is_circle为true时支持) | 0dp | setInnerBorderWidth() |
| inner_border_color | 内边框颜色 | #ffffff | setInnerBorderColor() |
| is_cover_src | border、inner_border是否覆盖图片内容 | false | isCoverSrc() |
| mask_color | 图片上绘制的遮罩颜色 | 不设置颜色则不绘制 | setMaskColor() |
可参考:https://github.com/SheHuan/NiceImageView
5.其它:
如果你需要实现类似钉钉的圆形组合头像,例如:
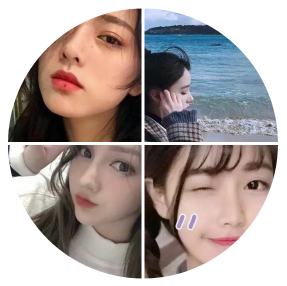
可以先生成对应的Bitmap,并用圆形的 NiceImageView 显示即可。如何生成组合Bitmap可以参考这里:CombineBitmap
四.如果你的项目中只有圆形的图片而不需要设置圆角图片的话,可以试试下面的第三方:
https://github.com/hdodenhof/CircleImageView
https://github.com/open-android/RoundedImageView
