【环信集成笔记】进阶篇-集成环信 ios 2.0,看这篇就够了
一、准备工作
1、注册环信帐号注册一个环信账号之后,我们用注册的帐号登陆。然后创建一个应用,会得到一个对应的AppKey,这个AppKey在初始化环信SDK的时候需要用到。(这个去环信官网自己弄环信)
2、制作推送证书如果需要做离线推送的功能,需要制作一个推送证书。如果只是需要实现单聊、群聊等功能,可以跳过此步骤。个人建议刚开始接触环信的开发者可以忽略此步骤。制作证书
3、下载环信sdk.下的是2.0
二、集成环信的SDK
1、把环信SDK添加到工程中
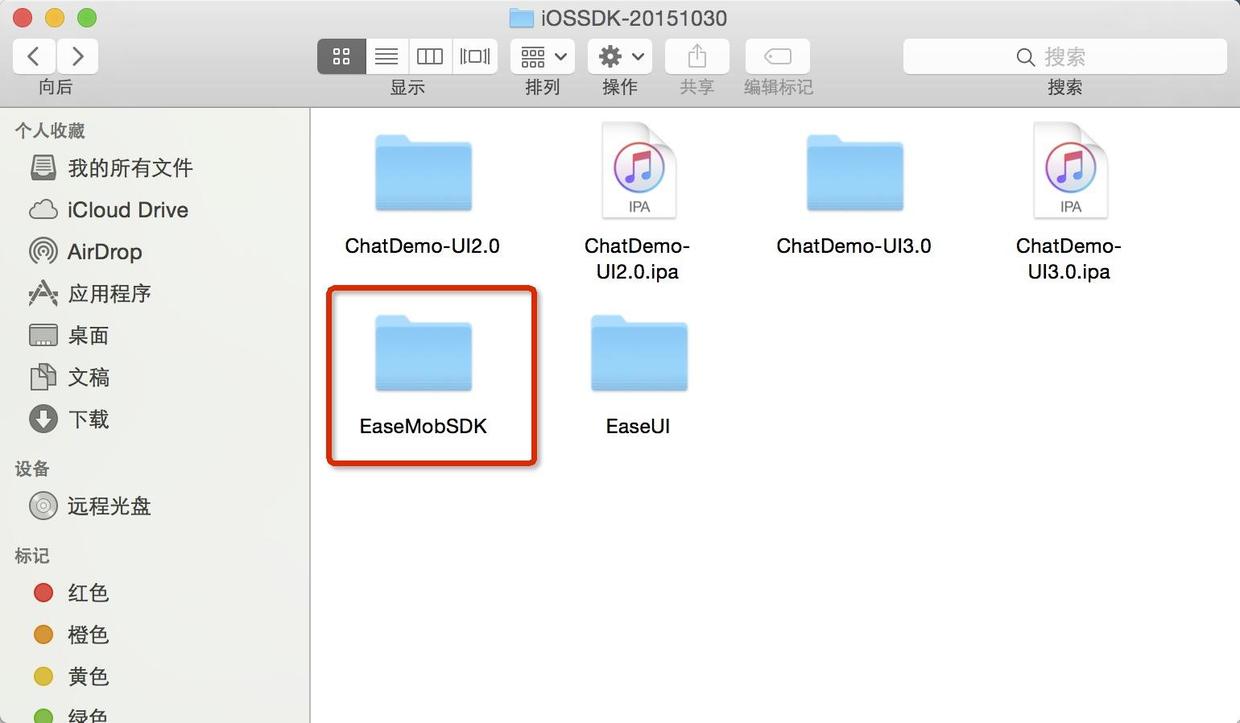
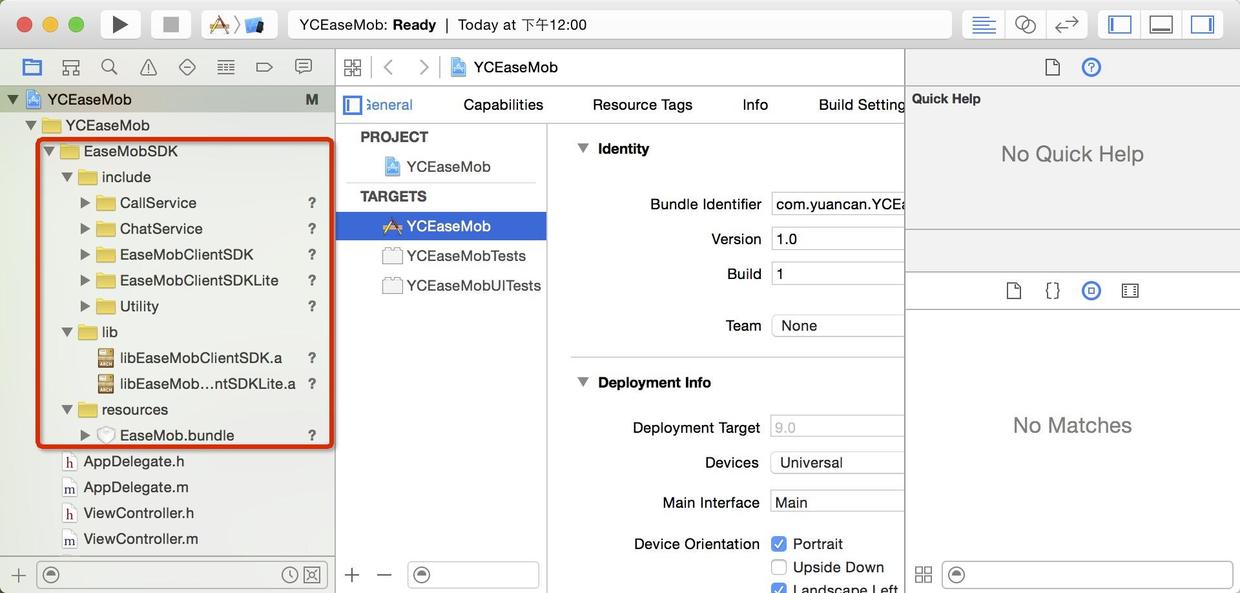
从环信官网下载下来的是一个压缩包,解压之后,把我们需要的环信SDK,即EaseMobSDK这个文件夹,整个的拖入到我们的工程中。如下图:
在lib文件夹下面有两个静态库,只需要用到一个,根据你的需求选择。
向Build Phases → Link Binary With Libraries 中添加依赖库
温馨提示:注意不要添加错了,也不能添加少了,添加完毕之后,不要着急,先编译一下。编译成功,则说明没有问题;如果编译报错,则仔细对照上面例举的静态库进行添加,直到编译成功,再进行下一步。
3、配置工程
3.1 不包含语音静态库的配置方法
(1) 删掉libEaseMobClientSDK.a,保留libEaseMobClientSDKLite.a;
(2) 在Build Settings -> Other Linker Flags 添加”fore_load”和”libEaseMobClientSDKLite.a”的相对路径。
如下图所示:
3.2 包含语音静态库的配置方法
(1) 删掉libEaseMobClientSDKLite.a,保留libEaseMobClientSDK.a;
(2) 在Build Settings -> Other Linker Flags 添加”-ObjC”。
如下图所示:
4、验证SDK是否添加成功
在AppDelegate.m文件中添加环信SDK初始化的方法,记得添加头文件”EaseMob.h”。下面提供了我用的测试AppKey,你可以替换成你自己申请的AppKey。编译成功,则说明你已经正确集成了环信的SDK了。
如果编译有问题,可能存在的原因:
(1) 静态库没有添加正确;
(2) 静态库工程配置不正确
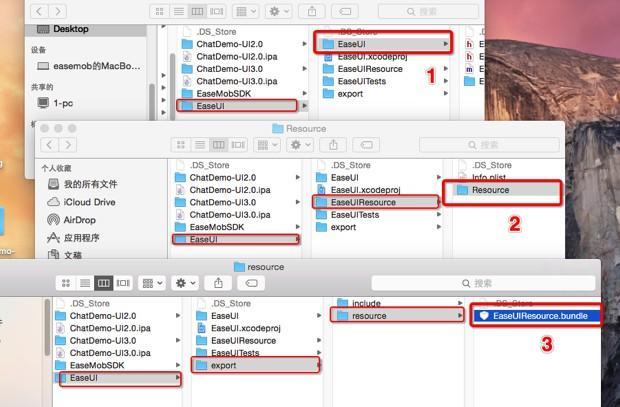
集成环信2.0UI文件,需要添加的文件,如下图所示:
添加完成之后,如下图所示:
四、设置pch文件的路径
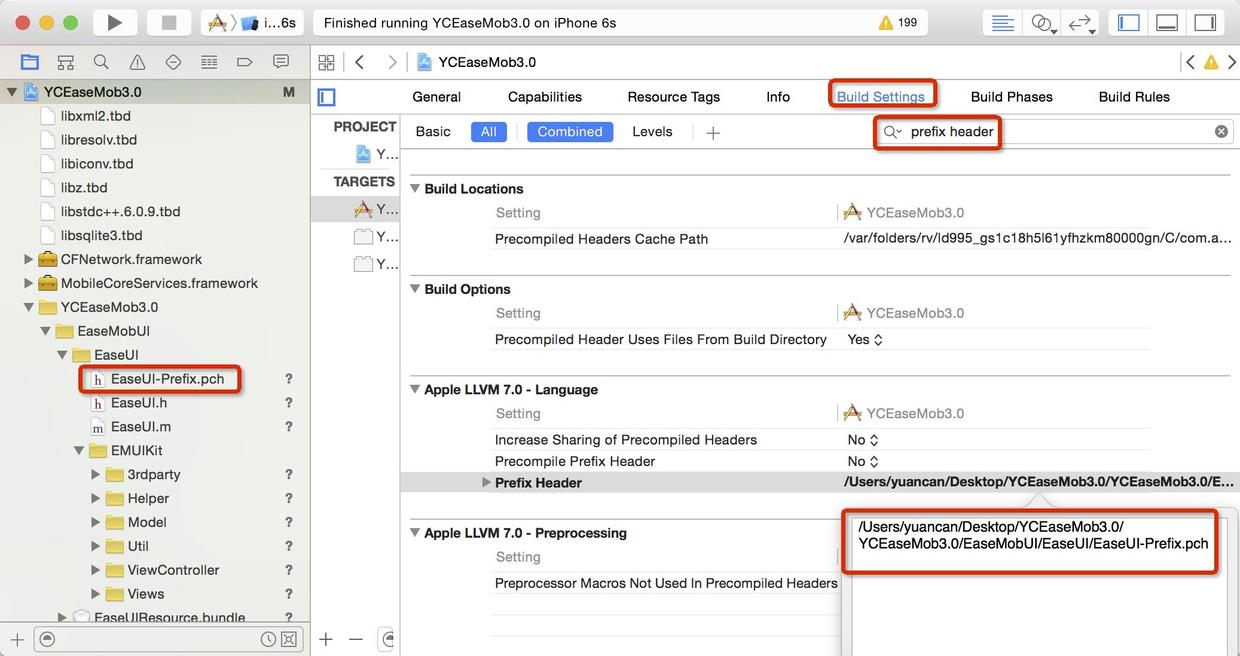
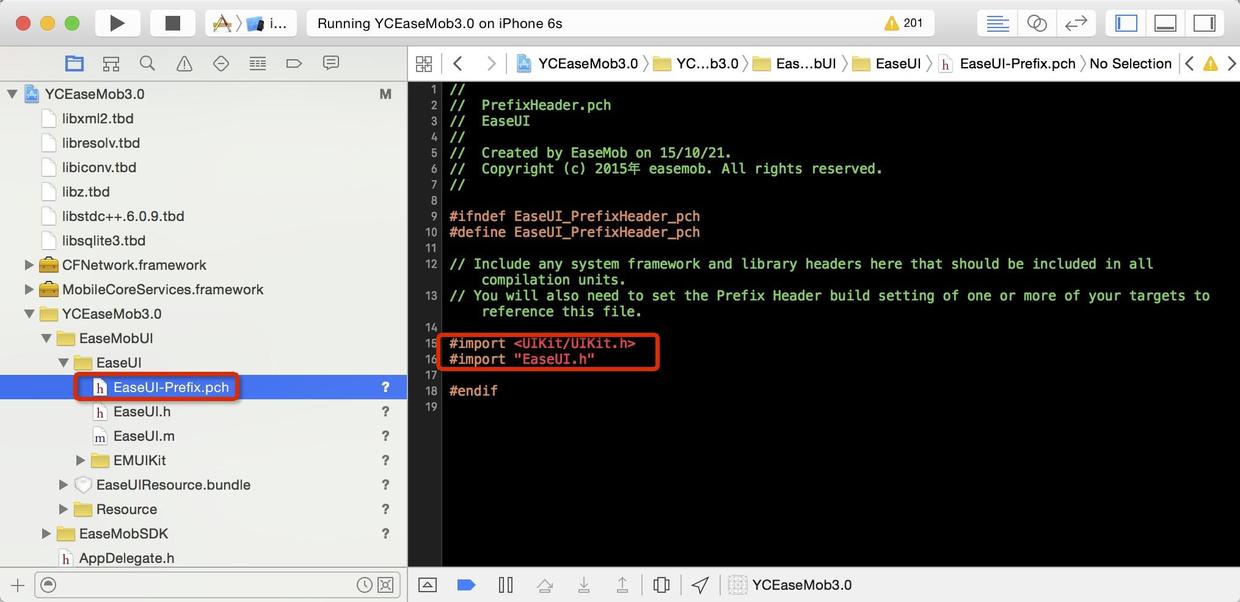
文件添加成功之后,编译会报错,因为你没有添加pch文件。自己手动添加pch文件(EaseUI-Prefix.pch),设置一下pch文件的加载路径即可。如下图所示:
在EaseUI-Prefix.pch中添加头文件”EaseUI.h”,如下图:
最后,编译一下,编译成功则说明添加集成UI文件成功。
五,搭建基本框架
1、新建三个UIViewController
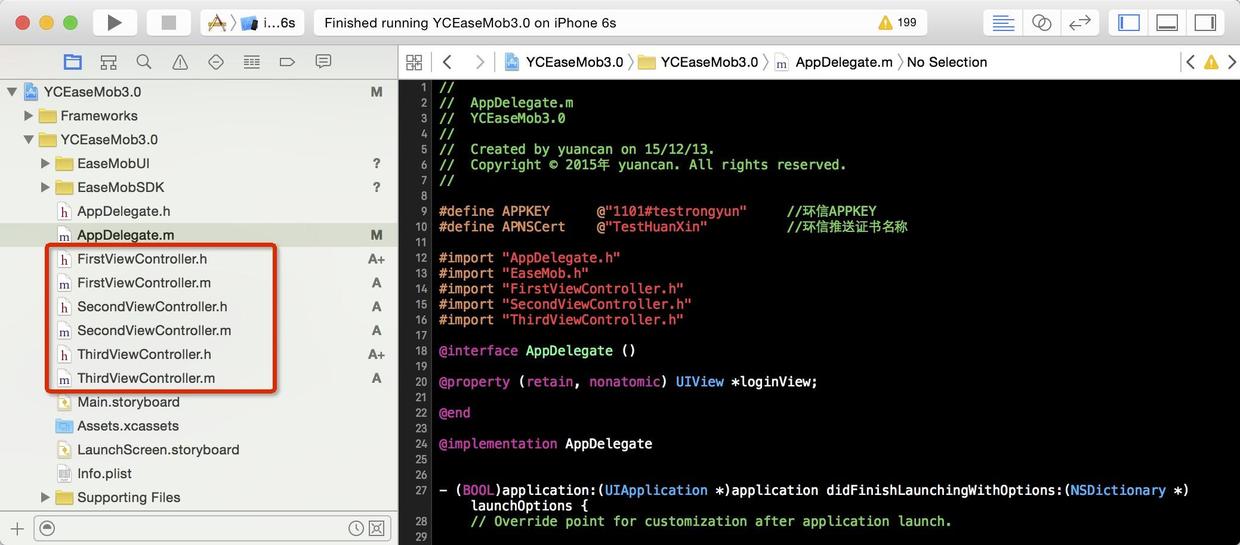
新建三个ViewController,继承UIViewController,分别命名为:FirstViewController,SecondViewController,ThirdViewController。如下图所示
2、添加登陆方法
在AppDelegate.m中添加如下代码:
六、添加与聊天有关的文件
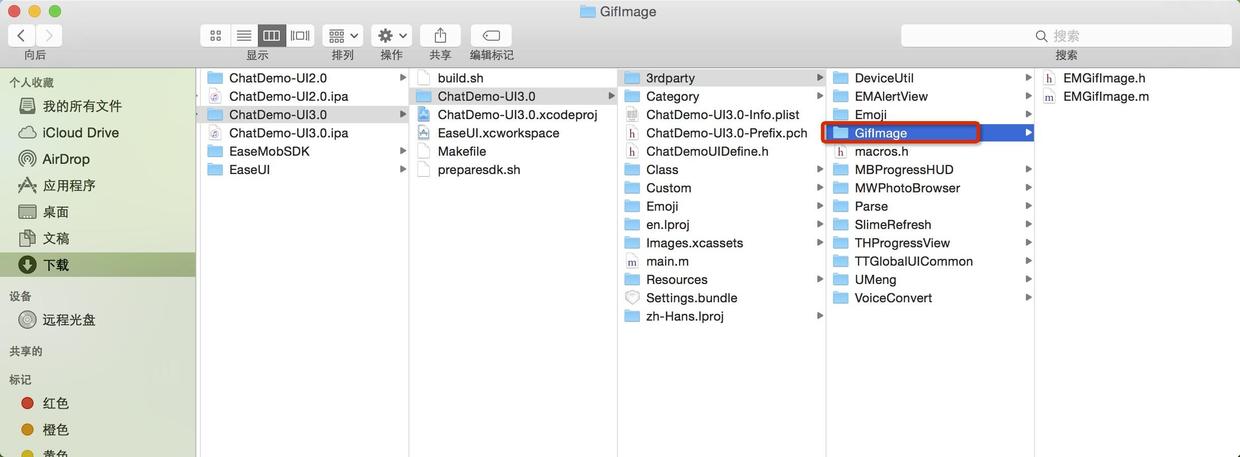
1、添加GifImage文件2、添加chat文件
添加完成之后,编译一下,把报错的地方全部注释掉,有很多地方需要注释掉,这些地方是因为有些我们不需要的文件没有添加进来。(自己注释比较麻烦)
注释好的GifImage和chat文件,下载后无需注释无关代码,可直接使用注释好的文件,
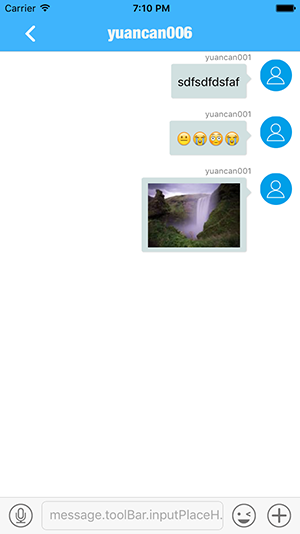
七、实现单聊在SecondViewController.m中添加如下代码:
真机运行一下,可能会报错,
解决方案:
把这个值设置成no
文章作者:环信热心用户樊呵呵
1、注册环信帐号注册一个环信账号之后,我们用注册的帐号登陆。然后创建一个应用,会得到一个对应的AppKey,这个AppKey在初始化环信SDK的时候需要用到。(这个去环信官网自己弄环信)
2、制作推送证书如果需要做离线推送的功能,需要制作一个推送证书。如果只是需要实现单聊、群聊等功能,可以跳过此步骤。个人建议刚开始接触环信的开发者可以忽略此步骤。制作证书
3、下载环信sdk.下的是2.0
二、集成环信的SDK
1、把环信SDK添加到工程中
从环信官网下载下来的是一个压缩包,解压之后,把我们需要的环信SDK,即EaseMobSDK这个文件夹,整个的拖入到我们的工程中。如下图:
在lib文件夹下面有两个静态库,只需要用到一个,根据你的需求选择。
libEaseMobClientSDKLite.a不包含实时语音功能,libEaseMobClientSDK.a包含所有功能。2、添加对应的依赖库
向Build Phases → Link Binary With Libraries 中添加依赖库
- MobileCoreServices.framework
- CFNetwork.frame
- libsqlite3.tbd
- libstdc++.6.0.9.tbd
- libz.tbd
- libiconv.tbd
- libresolv.tbd
- libxml2.tbd
温馨提示:注意不要添加错了,也不能添加少了,添加完毕之后,不要着急,先编译一下。编译成功,则说明没有问题;如果编译报错,则仔细对照上面例举的静态库进行添加,直到编译成功,再进行下一步。
3、配置工程
3.1 不包含语音静态库的配置方法
(1) 删掉libEaseMobClientSDK.a,保留libEaseMobClientSDKLite.a;
(2) 在Build Settings -> Other Linker Flags 添加”fore_load”和”libEaseMobClientSDKLite.a”的相对路径。
如下图所示:
3.2 包含语音静态库的配置方法
(1) 删掉libEaseMobClientSDKLite.a,保留libEaseMobClientSDK.a;
(2) 在Build Settings -> Other Linker Flags 添加”-ObjC”。
如下图所示:
4、验证SDK是否添加成功
在AppDelegate.m文件中添加环信SDK初始化的方法,记得添加头文件”EaseMob.h”。下面提供了我用的测试AppKey,你可以替换成你自己申请的AppKey。编译成功,则说明你已经正确集成了环信的SDK了。
如果编译有问题,可能存在的原因:
(1) 静态库没有添加正确;
(2) 静态库工程配置不正确
#define APPKEY @"1101#testrongyun" //环信APPKEY三、添加UI文件到你的工程
#define APNSCert @"TestHuanXin" //环信推送证书名称
#import "AppDelegate.h"
#import "EaseMob.h"
@interface AppDelegate ()
@end
@implementation AppDelegate
- (BOOL)application:(UIApplication *)application didFinishLaunchingWithOptions:(NSDictionary *)launchOptions {
//初始化环信SDK
[[EaseMob sharedInstance] registerSDKWithAppKey:APPKEY apnsCertName:APNSCert];
return YES;
}
集成环信2.0UI文件,需要添加的文件,如下图所示:
添加完成之后,如下图所示:
四、设置pch文件的路径
文件添加成功之后,编译会报错,因为你没有添加pch文件。自己手动添加pch文件(EaseUI-Prefix.pch),设置一下pch文件的加载路径即可。如下图所示:
在EaseUI-Prefix.pch中添加头文件”EaseUI.h”,如下图:
最后,编译一下,编译成功则说明添加集成UI文件成功。
五,搭建基本框架
1、新建三个UIViewController
新建三个ViewController,继承UIViewController,分别命名为:FirstViewController,SecondViewController,ThirdViewController。如下图所示
2、添加登陆方法
在AppDelegate.m中添加如下代码:
#define APPKEY      @"1101#testrongyun"     //环信APPKEY

#define APNSCert    @"TestHuanXin"          //环信推送证书名称

#import "AppDelegate.h"

#import "EaseMob.h"

#import "FirstViewController.h"

#import "SecondViewController.h"

#import "ThirdViewController.h"

@interface AppDelegate ()

@end
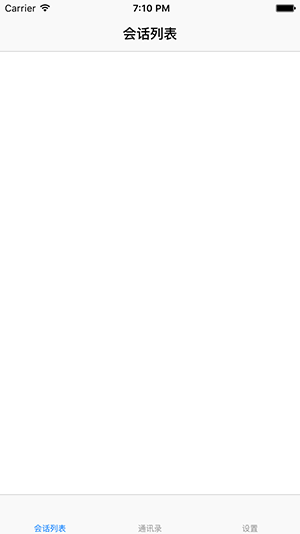
@implementation AppDelegate编译一下,看下效果。
- (BOOL)application:(UIApplication *)application didFinishLaunchingWithOptions:(NSDictionary *)launchOptions {
// Override point for customization after application launch.
//初始化环信SDK
[[EaseMob sharedInstance] registerSDKWithAppKey:APPKEY apnsCertName:APNSCert];
//异步登陆的方法(这里的账号密码要去环信后台自己注册)
[[EaseMob sharedInstance].chatManager asyncLoginWithUsername:@"账号" password:@"密码" completion:^(NSDictionary *loginInfo, EMError *error) {
if (!error && loginInfo) {
NSLog(@"登陆成功");
[self setUpNav];
}
} onQueue:nil];
return YES;
}
- (void)setUpNav
{
FirstViewController *firstVC = [[FirstViewController alloc] init];
SecondViewController *secondVC = [[SecondViewController alloc] init];
ThirdViewController *thirdVC = [[ThirdViewController alloc] init];
firstVC.title = @"会话列表";
secondVC.title = @"通讯录";
thirdVC.title = @"设置";
UITabBarController *tabBar = [[UITabBarController alloc] init];
tabBar.viewControllers = @[[[UINavigationController alloc] initWithRootViewController:firstVC],
[[UINavigationController alloc] initWithRootViewController:secondVC],
[[UINavigationController alloc] initWithRootViewController:thirdVC]];
self.window.rootViewController = tabBar;
self.window.backgroundColor = [UIColor whiteColor];
}
@end
六、添加与聊天有关的文件
1、添加GifImage文件2、添加chat文件
添加完成之后,编译一下,把报错的地方全部注释掉,有很多地方需要注释掉,这些地方是因为有些我们不需要的文件没有添加进来。(自己注释比较麻烦)
注释好的GifImage和chat文件,下载后无需注释无关代码,可直接使用注释好的文件,
七、实现单聊在SecondViewController.m中添加如下代码:
#import "SecondViewController.h"#import "ChatViewController.h"@interface SecondViewController (){

NSArray *arrSystem;

NSArray *arrFriends;

}

@property (retain, nonatomic)  UITableView *tableView;

@end

@implementation SecondViewController

- (void)viewDidLoad {
[super viewDidLoad];

arrSystem = @[@"申请与通知",@"群聊",@"聊天室"];

_tableView = [[UITableView alloc] initWithFrame:self.view.frame];

_tableView.delegate = self;

_tableView.dataSource = self;
[self.view addSubview:_tableView];

//获取好友列表
[[EaseMob sharedInstance].chatManager asyncFetchBuddyListWithCompletion:^(NSArray *buddyList, EMError *error) {

if (!error) {

NSLog(@"获取成功 -- %@",buddyList);

arrFriends = [NSArray arrayWithArray:buddyList];
[_tableView reloadData];

}

} onQueue:nil];

}

#pragma mark - UITableViewDelegate & UITableViewDataSource

- (NSInteger)numberOfSectionsInTableView:(UITableView *)tableView {

return 2;

}

- (NSInteger)tableView:(UITableView *)tableView numberOfRowsInSection:(NSInteger)section {

if (section == 0) {

return arrSystem.count;

} else {

return arrFriends.count;

}

}

- (UITableViewCell *)tableView:(UITableView *)tableView cellForRowAtIndexPath:(NSIndexPath *)indexPath {

static NSString *identifier = @"CELL";

UITableViewCell *cell = [tableView dequeueReusableCellWithIdentifier:identifier];

if (cell == nil) {

cell = [[UITableViewCell alloc] initWithStyle:UITableViewCellStyleDefault reuseIdentifier:identifier];

}

switch (indexPath.section) {

case 0:

{

cell.textLabel.text = [arrSystem objectAtIndex:indexPath.row];

cell.imageView.image = [UIImage imageNamed:@"groupPublicHeader"];

break;

}

case 1:

{

EMBuddy *eMBuddy = [arrFriends objectAtIndex:indexPath.row];

cell.textLabel.text = eMBuddy.username;

cell.imageView.image = [UIImage imageNamed:@"chatListCellHead"];

break;

}

default:

break;

}

return cell;

}

- (void)tableView:(UITableView *)tableView didSelectRowAtIndexPath:(NSIndexPath *)indexPath {

EMBuddy *buddy = [arrFriends objectAtIndex:indexPath.row];

ChatViewController *chatVC = [[ChatViewController alloc] initWithConversationChatter:buddy.username conversationType:eConversationTypeChat];

chatVC.title = buddy.username; //好友的名字

chatVC.hidesBottomBarWhenPushed = YES;
[self.navigationController pushViewController:chatVC animated:YES];

}编译,效果真机运行一下,可能会报错,
解决方案:
把这个值设置成no
文章作者:环信热心用户樊呵呵
