贪吃精灵小游戏demo
导读
下了班,闲着没事,写了两个小demo分享给大家练练手.一个通过简单动画完成的,另一个是绘图.你能1个小时写完俩个吗,在不参考源码的情况下,那说明你的动画和绘图掌握的很不错了.要是没能写出来,也不需要气馁,多敲敲你就掌握了.
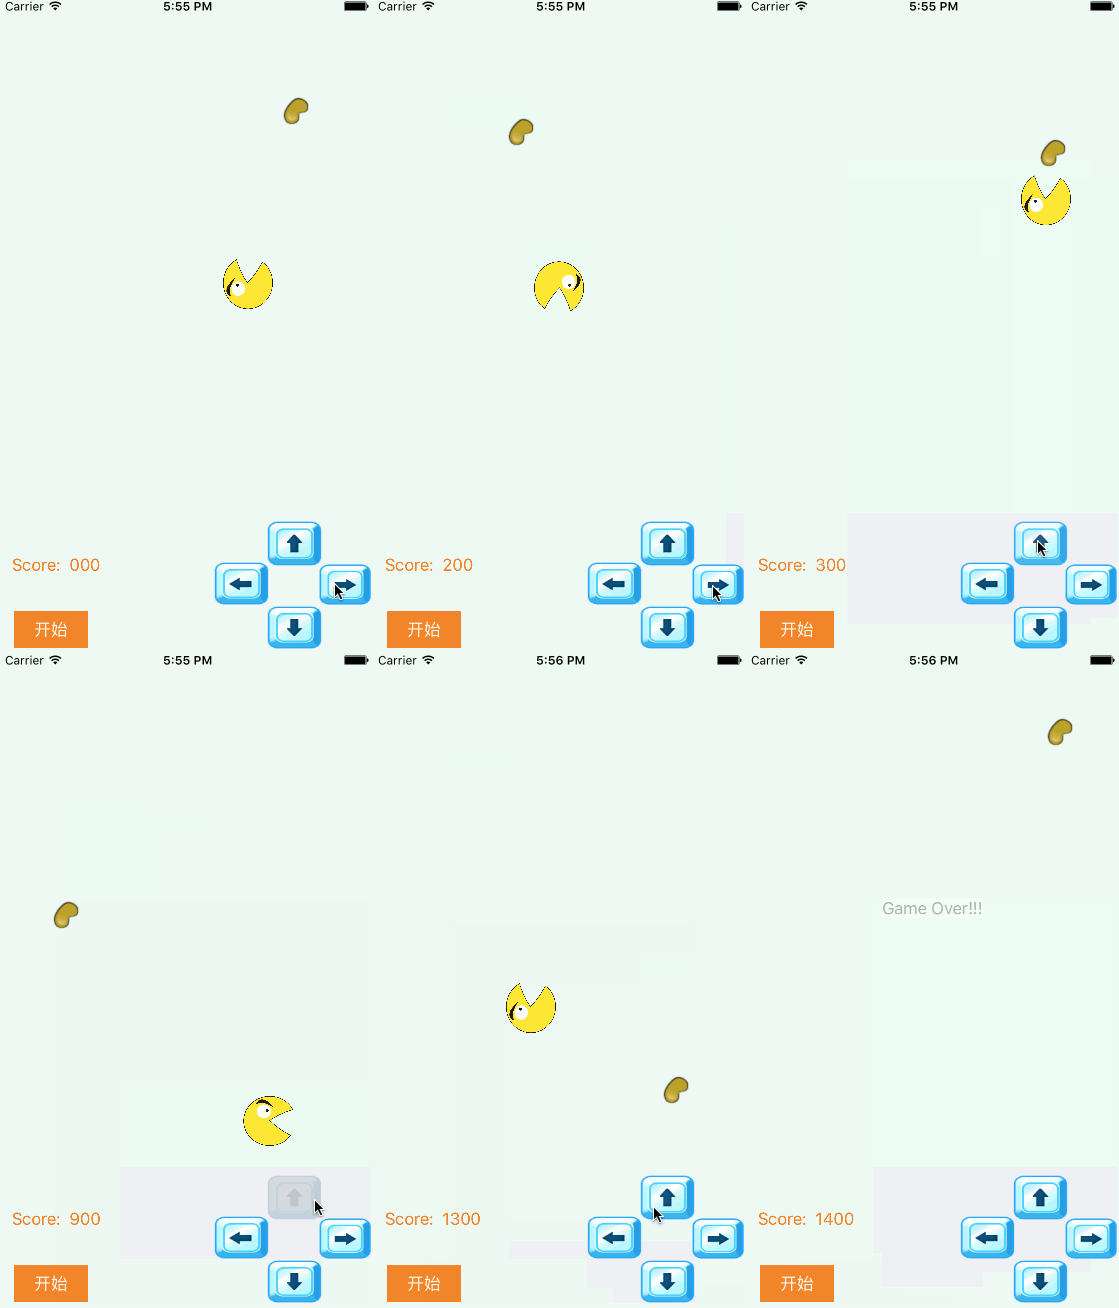
下面这个是贪吃精灵小游戏demo的效果图,这只是一共才200行代码的一个小demo哦.怎么样,看效果还挺不错吧!
源码链接https://github.com/newyeliang/EatDoudou欢迎star
·核心代码
游戏结果判断代码
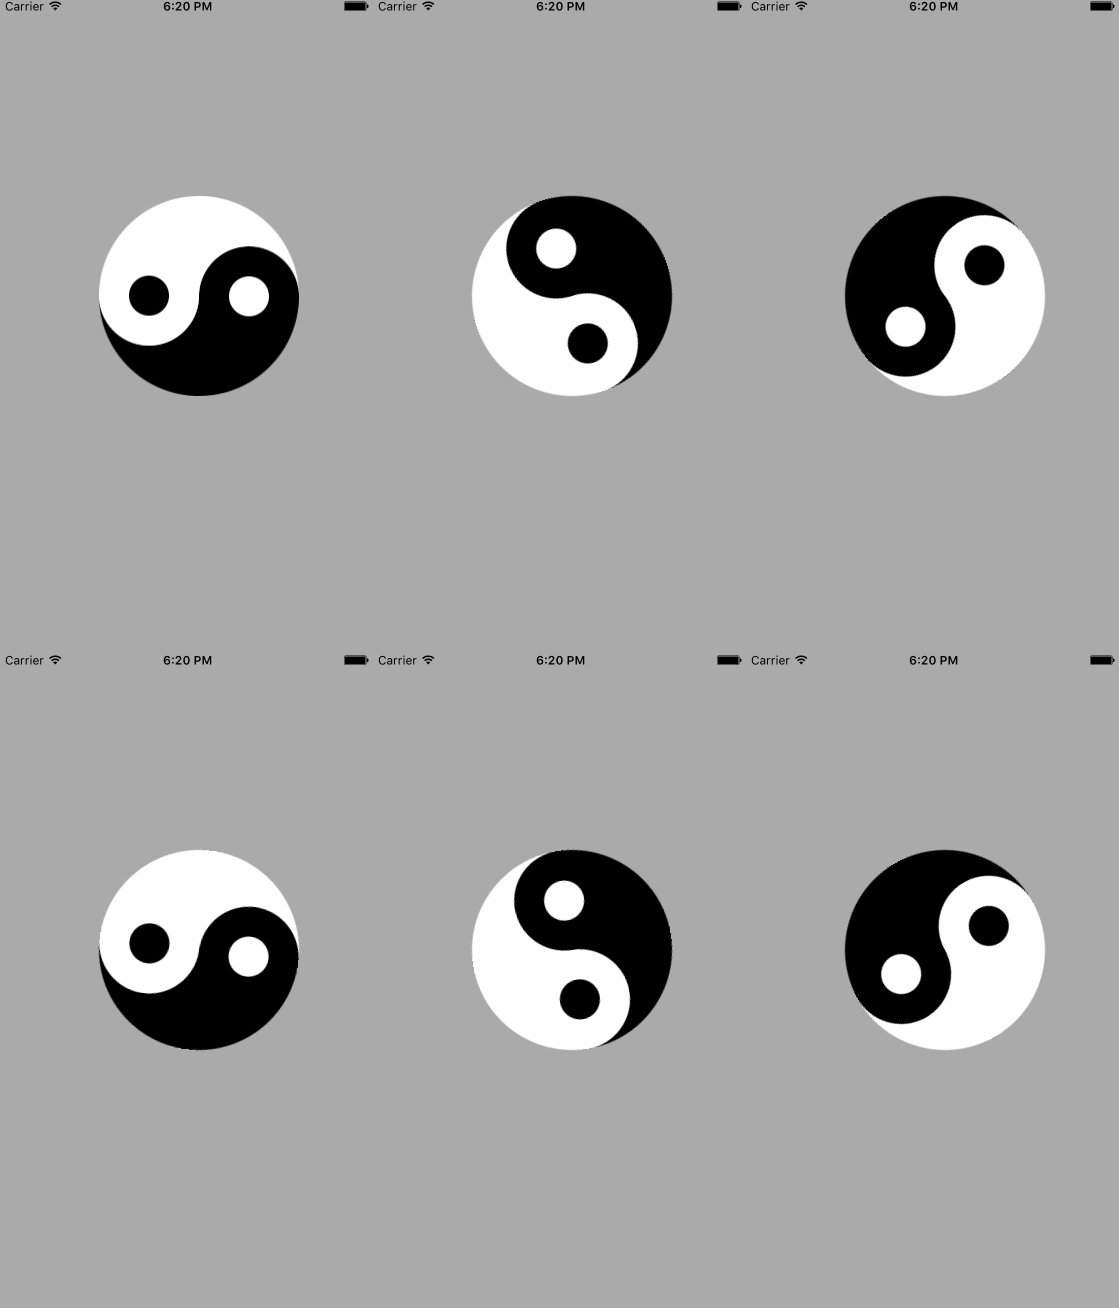
第二个是个太极图,看起来是不是很简单,你能画出来吗?打开Xcode试试吧!!!
没有任何业务逻辑,只需要你认真仔细的绘图,就OK了
·核心代码
源码链接https://github.com/newyeliang/TaiJIAnimation.git
下了班,闲着没事,写了两个小demo分享给大家练练手.一个通过简单动画完成的,另一个是绘图.你能1个小时写完俩个吗,在不参考源码的情况下,那说明你的动画和绘图掌握的很不错了.要是没能写出来,也不需要气馁,多敲敲你就掌握了.
下面这个是贪吃精灵小游戏demo的效果图,这只是一共才200行代码的一个小demo哦.怎么样,看效果还挺不错吧!
源码链接https://github.com/newyeliang/EatDoudou欢迎star
·核心代码
//判断方向,往不同的方向移动

- (void)moveAnimation{


    CGPoint center = self.eat.center;


    switch (self.direction) {


        case DirectionUp:{

             self.eat.image = [UIImage imageNamed:@"3"];
[UIView animateWithDuration:0.05 animations:^{

                self.eat.center = CGPointMake(center.x,center.y - self.speed);

            }];
[self result];

        }

            break;


        case DirectionLeft:{

            self.eat.image = [UIImage imageNamed:@"2"];
[UIView animateWithDuration:0.05 animations:^{

                self.eat.center = CGPointMake(center.x - self.speed,center.y );

            }];
[self result];

        }


            break;

        case DirectionDown:{

            self.eat.image = [UIImage imageNamed:@"4"];
[UIView animateWithDuration:0.05 animations:^{

                self.eat.center = CGPointMake(center.x,center.y + self.speed);

            }];
[self result];

        }

            break;


        case DirectionRight:{


            self.eat.image = [UIImage imageNamed:@"1"];
[UIView animateWithDuration:0.05 animations:^{

                self.eat.center = CGPointMake(center.x + self.speed,center.y );

            }];
[self result];


        }


            break;


        default:

            break;

    }

}
游戏结果判断代码
//计算游戏的分数,判断是否超出边界

- (void)result{


    //eat 和 doudou相交,分数+100

    if (CGRectIntersectsRect(self.eat.frame,self.doudou.frame)) {

        //移除原来的豆豆
[self.doudou removeFromSuperview];


        self.speed += 1;


        self.scoreLabel.text = [NSString stringWithFormat:@"Score:  %d",(int)(self.speed - 3) * 100];

        //添加新的豆豆

        self.doudou;

    }


    //超出边界,游戏结束

    if ( CGRectGetMaxX(self.eat.frame) > self.backgroundView.bounds.size.width ||CGRectGetMaxY(self.eat.frame) > self.backgroundView.bounds.size.height||CGRectGetMinX(self.eat.frame) < 0||CGRectGetMinY(self.eat.frame) < 0) {

[self.timer invalidate];
[self.eat removeFromSuperview];


        //game over 提示框

        UILabel * deathTip = [[UILabel alloc]init];

        deathTip.text = @"Game Over!!!";

        deathTip.backgroundColor = [UIColor whiteColor];
[deathTip sizeToFit];
[self.backgroundView addSubview:deathTip];

        deathTip.center = self.backgroundView.center;

[UIView animateWithDuration:4.0 animations:^{

            deathTip.alpha = 0.0;

        } completion:^(BOOL finished) {
[deathTip removeFromSuperview];

        }];

    }

}
第二个是个太极图,看起来是不是很简单,你能画出来吗?打开Xcode试试吧!!!
没有任何业务逻辑,只需要你认真仔细的绘图,就OK了
·核心代码
源码链接https://github.com/newyeliang/TaiJIAnimation.git
//绘制太极图

- (void)drawImage:(CGSize)size{


    float mid = size.width/2;


    //1.开启图像上下文

    UIGraphicsBeginImageContext(size);


    //2.获取上下文

    CGContextRef ctx = UIGraphicsGetCurrentContext();


    //3.绘图

        //3.1 绘制黑色的半边

    CGContextAddArc(ctx, mid, mid, mid, - M_PI_2, M_PI_2, 0);

    CGContextAddArc(ctx, mid, mid + 0.5 * mid, mid * 0.5, M_PI_2, -M_PI_2, 1);

    CGContextAddArc(ctx, mid, 0.5 * mid, mid * 0.5, M_PI_2, -M_PI_2, 0);
[[UIColor blackColor]set];

    CGContextFillPath(ctx);

        //3.2绘制白色的半边

    CGContextAddArc(ctx, mid, mid, mid, - M_PI_2, M_PI_2, 1);

    CGContextAddArc(ctx, mid, mid + 0.5 * mid, mid * 0.5, M_PI_2, -M_PI_2, 1);

    CGContextAddArc(ctx, mid, 0.5 * mid, mid * 0.5, M_PI_2, -M_PI_2, 0);
[[UIColor whiteColor]set];

    CGContextFillPath(ctx);


        //3.3绘制白色的小圆

    CGContextAddArc(ctx, mid, 0.5 * mid, 0.2 * mid, M_PI,- M_PI , 1);

    CGContextFillPath(ctx);

        //3.4绘制黑色的小圆

    CGContextAddArc(ctx, mid, 1.5 * mid, 0.2 * mid, M_PI,- M_PI , 1);
[[UIColor blackColor]set];

    CGContextFillPath(ctx);


    //4.获取生成的图片

    UIImage *image=UIGraphicsGetImageFromCurrentImageContext();

    //5.显示生成的图片到imageview

    self.backgroundColor = [UIColor colorWithPatternImage:image];

    UIGraphicsEndImageContext();


}


